Category: Cost Guides

  • Heat Pump vs. Furnace: Compare Installation and Running Costs

    Heat Pump vs. Furnace: Compare Installation and Running Costs

    Quick answer: Compare a heat pump with a furnace using the same home, comfort needs, and cooling plan. A heat pump can provide heating and cooling; a furnace quote may cover heating alone. The lower heating bill depends on your electricity price, gas price, and the heat pump’s performance in your climate—not simply on which machine has the higher efficiency number.

    A $7,000 furnace quote and a $14,000 heat-pump quote are not enough to make the decision. Does the first leave an aging air conditioner in place? Does the second include electrical work and backup heat? Before comparing the totals, ask both contractors to price the same finished job.

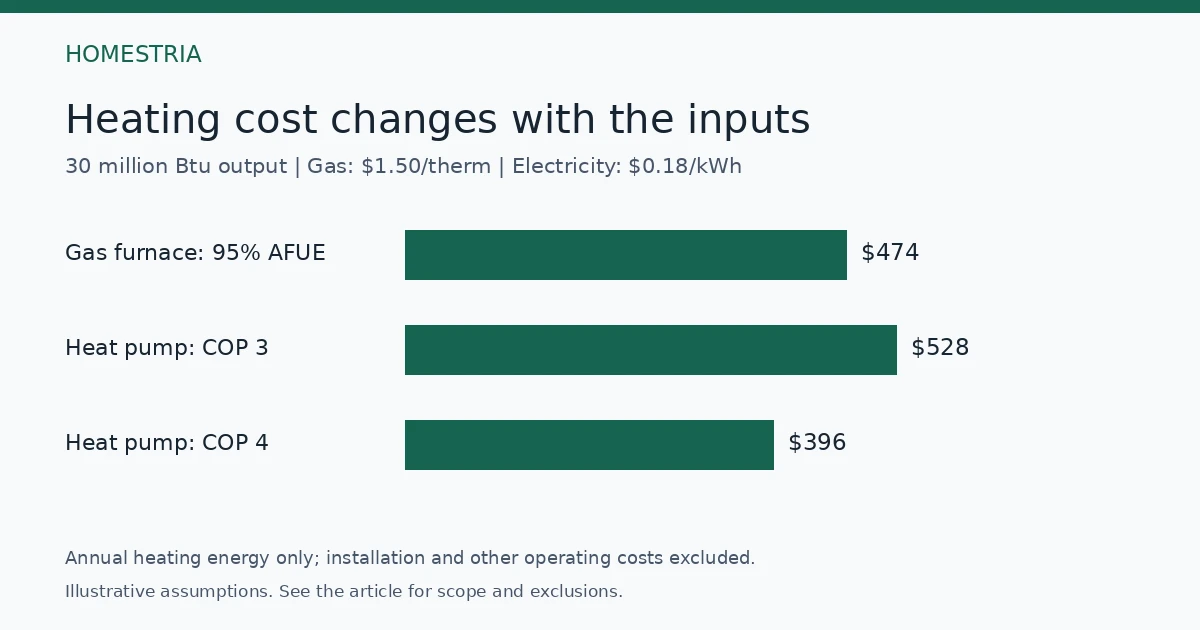
    Annual heating-energy costs under three illustrative electricity and gas price scenarios.
    Illustrative energy costs only. See the assumptions and exclusions in the comparison below.

    Start with a comparable installation quote

    Request these items in writing; prices below are not national cost estimates.
    ScopeHeat pump proposalFurnace proposal
    Heating and coolingIndoor and outdoor equipment, controls, backup planFurnace plus any air-conditioning work needed during your comparison period
    Home-specific designHeating load and low-temperature capacityHeating load and appropriate furnace output
    Installation extrasCircuit/panel work, refrigerant lines, condensate, ducts, permitsVenting, gas piping, condensate, ducts, permits
    After installationCommissioning, labor warranty, service termsCommissioning, labor warranty, service terms

    Use the contractor quote comparison guide to separate firm prices from allowances. If one bid leaves electrical work “as needed,” get an allowance or a separate electrician’s estimate before treating it as the cheaper option.

    The two efficiency numbers mean different things

    A furnace’s annual fuel utilization efficiency (AFUE) describes useful heat output relative to fuel input over the heating season. A 95% AFUE assumption means 0.95 units of useful furnace heat per unit of fuel energy; it does not include every loss between the equipment and each room. See the Department of Energy’s furnace methodology.

    For the heat pump, coefficient of performance (COP) compares heat delivered with electricity consumed in the same energy units. Our worksheet uses an assumed seasonal effective COP, including backup heat in the modeled electricity use. It is not a guarantee or a label rating. Ask the contractor for a climate-specific energy estimate, low-temperature capacity, and the expected backup-heating share.

    HSPF2 is a standardized seasonal heating rating; SEER2 describes cooling efficiency. Neither number should be entered directly as COP. DOE explains the ratings and why climate matters in its air-source heat-pump purchasing guide. A cold-weather design also needs enough output on the coldest design days, not merely an attractive annual average.

    Compare the heating energy cost with your own rates

    Use the marginal electricity and gas rates you would actually pay for the added usage, including variable delivery charges and applicable taxes. Keep fixed monthly service charges separate. Your whole-home bill includes other uses, so dividing it by floor area is not a heating estimate. Start with how to read your electric bill.

    Worksheet formulas:
    Furnace fuel cost = annual heat output needed in Btu ÷ (100,000 × AFUE as a decimal) × dollars per therm.
    Heat-pump electricity cost = annual heat output needed in Btu ÷ (3,412 × effective COP) × dollars per kWh.

    The energy conversions are 100,000 Btu per therm and approximately 3,412 Btu per kWh; see EIA’s energy-unit reference. Use the same output boundary for both options. Distribution losses, furnace blower electricity, and any heat-pump auxiliaries omitted from your COP estimate need separate adjustments.

    Illustrative annual heating-energy costs: 30 million Btu of useful equipment output, 95% AFUE furnace, heat pump effective COP 3.0. These are chosen scenarios, not utility averages.
    Electricity / gas rateFurnaceHeat pump
    $0.12/kWh; $2.50/therm$789$352
    $0.18/kWh; $1.50/therm$474$528
    $0.30/kWh; $1.50/therm$474$879

    The middle row is a useful warning against assuming that a heat pump must cut the bill. At $0.18/kWh and $1.50/therm, the heating-energy break-even effective COP is about 3.34. At COP 2.0 the modeled heat-pump cost rises to about $791; at COP 4.0 it falls to about $396. Ask which seasonal performance estimate is credible for your actual equipment and location.

    What happens to the higher installation price?

    Suppose matched, complete quotes are $11,000 for a furnace-and-air-conditioner option and $14,500 for a heat-pump option. These are hypothetical quotes, not reported market prices. The heat-pump premium is $3,500. Using the first rate scenario above gives roughly $438 in annual heating-energy savings, so simple payback is about eight years. Using the middle scenario gives no heating-energy payback because that heat pump costs more to run.

    That calculation is only a first pass. Add any difference in cooling energy, maintenance, repairs, financing and fixed utility charges. If you keep gas for cooking or hot water, do not count the entire gas customer charge as savings. Compare both choices over the same period and account for equipment that would need replacing partway through it. A simple payback is not a promised equipment life or investment return.

    Three situations that change the decision

    Your furnace works and the AC is young. Compare repairing or retaining the present system with replacing it now. The entire new installation cost matters; an efficiency premium against equipment you did not need to buy is not the right baseline.

    Both heating and cooling are due for replacement. This is the cleaner comparison: price a complete furnace-plus-AC option against the complete heat-pump system, then evaluate local operating costs and comfort.

    Your home needs substantial cold-weather backup. Ask how much heat the compressor supplies at the local design temperature, when backup starts, and whether it is electric resistance or a retained furnace. A dual-fuel proposal needs separate electric and gas operating hours; do not give all delivered heat the compressor’s best COP.

    Already own a heat pump and want to understand a winter bill? Use the overnight setback and morning recovery cost worksheet before assuming that a lower night setting saves money. It separates a scheduling question from an equipment-replacement decision.

    Treat incentives as confirmed funding, not a discount label

    For equipment placed in service in 2026, do not subtract the former federal Section 25C heat-pump credit. The IRS states that 25C is unavailable for property placed in service after December 31, 2025. State and utility programs are separate: verify current funding, income rules, equipment eligibility and any required preapproval with the program administrator.

    Show the full amount due to the installer and the timing of any verified reimbursement separately. A rebate paid later does not reduce the cash needed on installation day. Our home energy upgrade budget guide explains how to keep that distinction visible.

    What to bring to the final quote review

    Bring 12 months of utility usage, the age and condition of both existing systems, and your expected ownership period. Request an itemized scope, load calculation, low-temperature capacity and backup assumptions, permits, commissioning checks, exclusions and labor warranty. Have the contractor show the annual cost at today’s rates and at a less favorable rate or efficiency assumption.

    If the savings disappear under a modest change, comfort or equipment condition may still justify the project—but it should not be sold to you as a certain bill reduction. If the present furnace only needs assessment, start with the furnace inspection guide.

    If that assessment leaves you choosing between a major repair and replacement, use the furnace repair-versus-replacement worksheet to normalize the diagnosis, safety findings, work scope, and out-of-pocket totals.

    Sources and calculation notes

    Sources checked September 21, 2026, U.S. Eastern time: DOE furnace and heat-pump purchasing guidance, EIA energy units, and IRS credit termination guidance linked above. All dollar quotes, energy prices and operating scenarios are Homestria illustrations. Figures are rounded after calculation. This guide does not size equipment, evaluate a particular home, or replace an on-site assessment.
  • Tree Trimming vs. Removal Cost in 2026

    Tree Trimming vs. Removal Cost in 2026

    Quick Answer

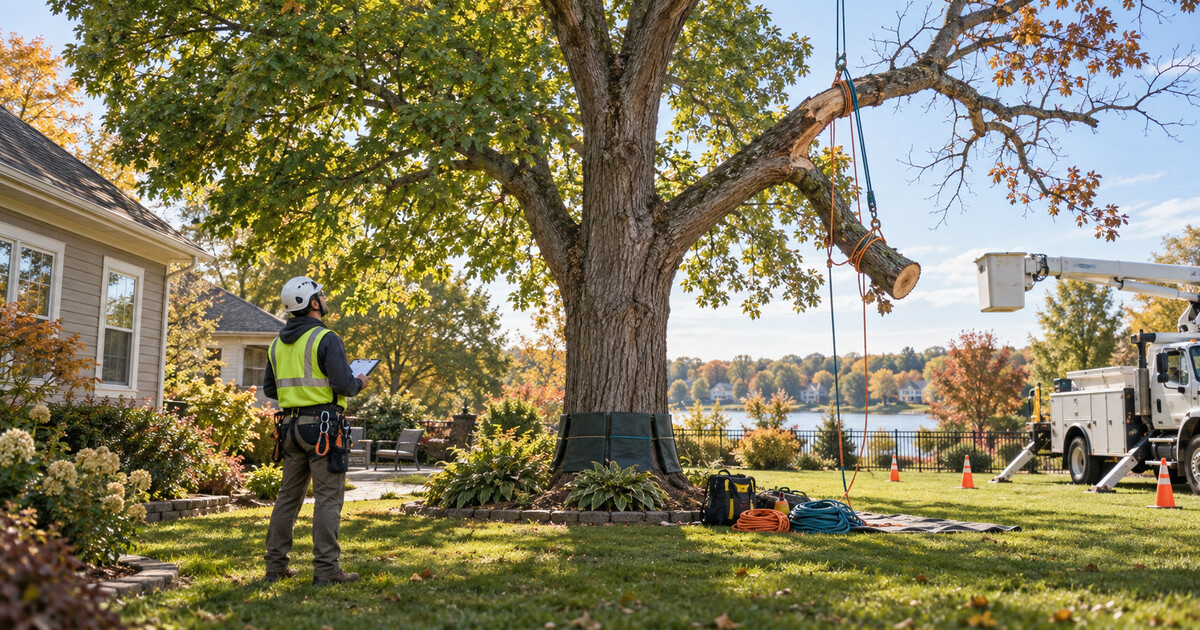
    Professional tree trimming commonly costs about $430 to $640 per tree, while removal commonly runs about $200 to $2,000, with an average near $750. Those figures are not interchangeable quotes. Trimming preserves a tree by removing selected branches; removal takes down the entire tree and may still exclude stump grinding, debris hauling, permits, crane work, or property restoration.

    If the tree is dead, structurally unstable, storm-damaged, touching utilities, or close enough to strike a house, do not choose by price alone. Start with a qualified arborist or tree-risk assessment, then compare written scopes from insured contractors.

    Cost Comparison at a Glance

    ServiceCommon national planning rangeWhat the quote should describe
    Tree trimming or pruning$430–$640 per treeWhich branches, pruning objective, access method, cleanup, and debris hauling
    Small-tree trimmingCan be below the common rangeGround-access work, branch size, cleanup
    Large-tree trimmingCan reach about $1,835 for trees over 60 feetClimbing or bucket truck, rigging, traffic or utility controls
    Tree removal$200–$2,000 common range; average about $750Felling or sectional removal, rigging, haul-away, access protection
    Stump workOften separateGrinding depth, chip removal, backfill, root work
    Complex removalMay exceed the common rangeCrane, limited access, power lines, structures, emergency timing

    These are U.S. planning figures, not a substitute for a site-specific quote. Price changes with height, trunk diameter, species, condition, access, local labor, permit rules, disposal, emergency timing, and proximity to people, buildings, roads, or utilities.

    What You Are Actually Buying

    Tree trimming is a selective service. The crew removes particular limbs to improve clearance, structure, health, or safety while keeping the tree. A useful quote should identify the pruning objective rather than simply say “trim tree.”

    Tree removal is a dismantling and disposal project. A straightforward open-yard removal and a large tree over a house can share the same service name while requiring entirely different labor, equipment, and risk controls.

    That distinction explains why the low end of a removal range can overlap the cost of trimming. A small, accessible removal may cost less than carefully pruning a very large tree that requires climbing, rigging, and traffic control.

    Choose Trimming When the Tree Is Worth Preserving

    Trimming is usually the better scope when:

    • The tree is generally healthy and stable.
    • The issue is dead, broken, rubbing, or poorly placed branches.
    • Clearance is needed from the roof, driveway, sidewalk, or sight line.
    • The canopy needs a professional structural-pruning plan.
    • Storm damage is limited to branches and the remaining structure is sound.
    • An arborist believes risk can be reduced without removing the tree.

    Ask the estimator to state which limbs will be removed and why. A percentage such as “reduce the crown 20%” is less useful than a written objective tied to structure, clearance, or deadwood.

    Choose Removal When Risk or Site Conflict Cannot Be Corrected

    Removal may be the appropriate scope when:

    • The tree is dead or dying.
    • The trunk, major unions, or root plate shows serious structural failure.
    • The tree presents an unacceptable risk to people or property.
    • Storm damage has compromised the main structure.
    • A construction conflict cannot be resolved while retaining the tree.
    • Disease or decline makes preservation impractical.
    • Local rules or an arborist’s assessment support removal.

    A leaning tree is not automatically unsafe, and a vertical tree is not automatically sound. Soil movement, root damage, cavities, cracks, decay, previous topping, and load distribution matter. Photographs can help an arborist prepare, but they do not replace an on-site assessment for a potentially hazardous tree.

    A Planning Example

    Suppose a homeowner receives a $535 trimming estimate, roughly the midpoint of a common $430–$640 range, and a $1,100 removal estimate, the midpoint of the $200–$2,000 common removal range.

    The difference is $565, but that does not mean removal is only $565 “better” or trimming is automatically the bargain. The two quotes must be normalized:

    • Does the removal price include hauling the trunk and branches?
    • Is stump grinding included?
    • Does the trimming price include all specified deadwood and cleanup?
    • Will either job need a bucket truck, climber, crane, lane closure, or utility coordination?
    • Who pays for permits?
    • Who repairs lawn, fence, irrigation, driveway, or planting damage?

    If removal adds $150 for stump work, $95 for chipping, and $100 for a permit, the comparable planning total becomes $1,445. The example is illustrative; those add-ons vary by location and job.

    Why Location Changes the Price

    Urban jobs may cost more because of traffic control, restricted access, parking, overhead utilities, and higher labor costs. Rural jobs may add travel or mobilization charges. Regions with frequent storms can see temporary demand spikes.

    Local ordinances may protect certain species, large trees, street trees, or trees in designated districts. Do not assume ownership alone guarantees permission to remove. Ask the municipality, homeowners association, or utility before signing a removal contract when jurisdiction is unclear.

    What a Complete Tree-Service Quote Should Include

    Use the same checklist for each bidder:

    1. Tree identification and exact work location.
    2. Trimming objective or removal method.
    3. Branches, trunk sections, or size limits included.
    4. Climbing, bucket truck, crane, and rigging assumptions.
    5. Utility coordination and required clearances.
    6. Cleanup, chipping, hauling, and firewood disposition.
    7. Stump grinding depth and handling of chips.
    8. Permit responsibility and fees.
    9. Protection for lawn, driveway, roof, fence, and irrigation.
    10. Proof of liability insurance and workers’ compensation where applicable.
    11. Change-order rules for hidden decay, bees, unstable wood, or blocked access.
    12. Schedule, weather delays, and emergency premiums.

    A lower bid may simply omit disposal, stump work, permit handling, or restoration. Compare scope before comparing price.

    Safety Limits

    Large-tree pruning and removal are high-risk operations. They can involve climbing, suspended loads, chainsaws, rigging, cranes, traffic, and energized power lines. ISA’s TreesAreGood guidance says pruning or removing large trees should be handled by trained and properly equipped professionals.

    Do not climb, cut a supported limb, work from a ladder with a chainsaw, or approach a tree contacting a utility line. Contact the utility for line-clearance questions. If a storm-damaged tree is resting on a building or wire, keep people away and treat the area as an emergency scene.

    Questions to Ask an Arborist or Tree Contractor

    • Is the proposed work trimming, structural pruning, risk reduction, or full removal?
    • What defect or objective justifies the scope?
    • Can the tree reasonably be retained?
    • Which branches will be removed?
    • What access equipment and rigging are assumed?
    • Are disposal, stump work, permits, and restoration included?
    • Will a utility need to disconnect, de-energize, or clear lines?
    • Can you provide current insurance documentation?
    • What would cause the price to change after work starts?
    • What written care or monitoring plan follows trimming?

    Frequently Asked Questions

    Is trimming always cheaper than removal?

    No. Large-tree pruning with climbing and rigging can cost more than removing a small, open-yard tree. Compare the same tree, access, cleanup, and risk scope.

    Does a removal quote include the stump?

    Not necessarily. Ask whether the quote includes grinding, the grinding depth, chip removal, backfill, and surface restoration.

    Already planning removal? Use our stump-grinding quote checklist to compare chip removal, soil, grading, and lawn restoration for the same finished yard.

    Should I remove a tree because branches touch the roof?

    Not automatically. Clearance pruning may solve the problem if the tree is otherwise healthy and the work can be done without damaging its structure. Get a professional assessment.

    Can a tree company work around power lines?

    Only with the proper qualifications and utility coordination. Call the utility first when branches are near energized lines.

    Will homeowners insurance pay for tree removal?

    Coverage depends on the event, policy, damage, and whether the tree struck a covered structure. Preserve evidence and contact the insurer before removing a fallen tree from a structure unless immediate safety work is necessary.

    How many quotes should I get?

    For non-emergency work, three written quotes make scope differences easier to see. For an unstable tree or active hazard, prioritize site safety and qualified response.

    Related Homestria Guides

    Roof Repair vs. Replacement Cost in 2026

    https://homestria.com/roof-repair-vs-replacement-cost-2026/

    Portable vs. Standby Generator Cost in 2026

    https://homestria.com/portable-vs-standby-generator-cost-2026/

    Sources Checked September 21, 2026

    Angi — Tree Removal Cost, updated July 8, 2026

    https://www.angi.com/articles/how-much-does-tree-removal-cost.htm

    HomeAdvisor — Tree Removal Cost, updated June 19, 2026

    https://www.homeadvisor.com/cost/lawn-and-garden/tree-removal/

    LawnStarter — Tree Trimming Cost in 2026, updated December 27, 2025

    https://www.lawnstarter.com/blog/cost/tree-trimming-price/

    ISA / TreesAreGood — Why Hire an Arborist?

    https://www.treesaregood.org/Tree-Owner-Resources/Why-Hire-an-Arborist

  • Boiler Repair vs. Replacement Cost in 2026: Diagnose the Scope Before Winter

    Boiler Repair vs. Replacement Cost in 2026: Diagnose the Scope Before Winter

    Quick Answer

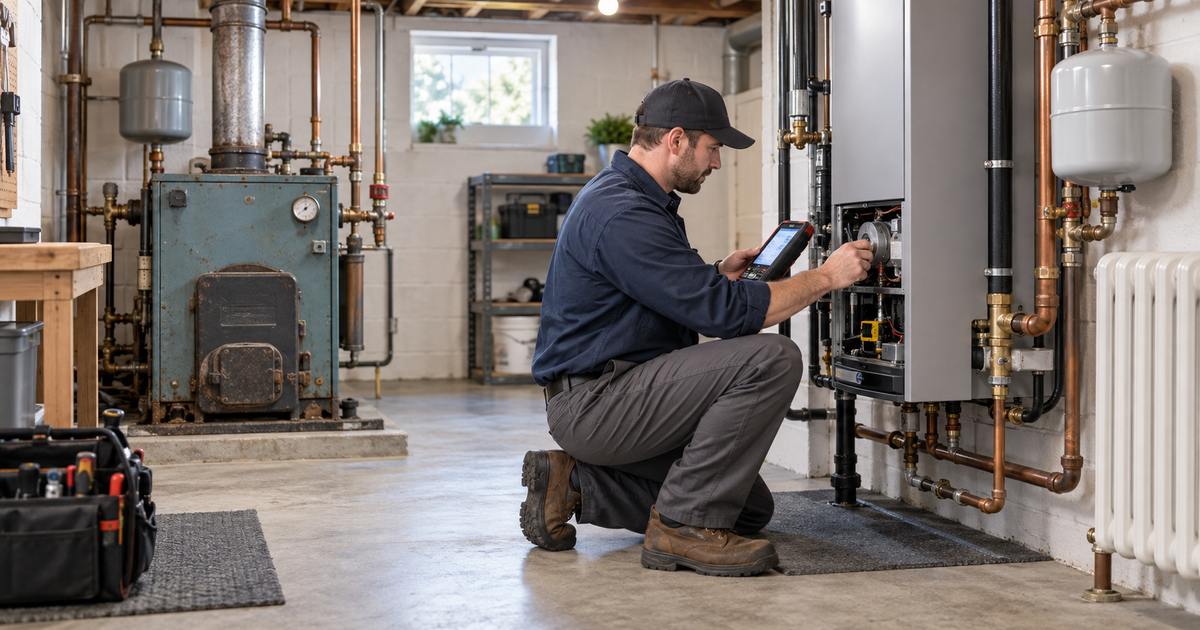
    Boiler repair is usually the less expensive first step when a qualified technician can identify a contained failure. Current national planning ranges put repairs around $95–$1,500, while boiler replacement commonly runs $3,307–$8,464, averaging about $5,880.

    Those ranges are not interchangeable. A repair estimate may cover one component and labor. A replacement quote may or may not include removal, permits, venting, controls, pumps, piping, electrical work, and startup testing. Diagnose the fault first, then compare complete scopes rather than using boiler age or one percentage rule by itself.

    Repair vs. replacement at a glance

    OptionCurrent planning rangeBest fitCommon exclusions
    Repair$95–$1,500Identified component failure, serviceable equipment, available partsDiagnostic fee, after-hours premium, related leaks, follow-up testing
    Annual inspection$200–$400Working system that needs safety and condition reviewRepairs and replacement parts
    Routine maintenance$150–$400Cleaning, checks, and preventive serviceMajor repair and emergency response
    Replacement$3,307–$8,464; average about $5,880Multiple failures, unsafe or unreliable system, unavailable parts, incompatible or badly sized equipmentRemoval, permits, new venting, controls, electrical, gas line, radiator or piping work

    These are U.S. planning figures from current national guides. Your fuel type, capacity, region, system configuration, access, and code requirements determine the actual bid.

    Start with the diagnosis, not the age

    Age belongs in the decision, but it does not diagnose a boiler. A newer unit with a failed igniter or control may be worth repairing. An older unit with repeated leaks, obsolete parts, poor venting, or multiple failing components may not be.

    Ask the technician to identify:

    • The failed component or unresolved test result.
    • Whether the symptom is inside the boiler or elsewhere in the hydronic or steam system.
    • Parts availability and warranty.
    • Any active water, combustion, pressure, or electrical safety issue.
    • The expected scope if another related fault appears.
    • Whether the repair restores normal operation or is only temporary.

    If the diagnosis is uncertain, do not convert uncertainty into a complete replacement without explaining the tests and findings.

    What current repair pricing includes

    Angi’s August 3, 2026 guide places boiler repairs at $95–$1,500 and average service costs around $425. It lists annual inspections at $200–$400, routine maintenance at $150–$400, service calls at $75–$250, and cleaning or descaling at $150–$350.

    Fuel type changes the comparison. The cited planning ranges are $100–$400 for gas-boiler repairs, $200–$450 for electric, and $200–$500 for oil. Major component work can exceed $1,000. Labor, parts, access, emergency timing, and connected-system problems can move a quote beyond the simple range.

    A professional should also distinguish the boiler from the distribution system. A cold room can involve a circulator, air in the loop, controls, valves, piping, radiators, or baseboards—not necessarily the boiler heat exchanger.

    What a replacement quote needs to show

    A replacement quote should identify the model, fuel, rated capacity, efficiency, venting method, controls, pumps, electrical needs, and what happens to the old equipment. It should explain how the capacity was chosen rather than relying on the size of the existing unit alone.

    HomeAdvisor’s June 17, 2026 guide places boiler replacement at $3,307–$8,464, averaging $5,880. It notes permit costs of about $50–$300 and old-unit removal that may add roughly $50–$200, although removal is often already included. Angi’s broader installation range is $600–$12,000, showing why scope matters more than one headline number.

    Do not add every allowance automatically. First confirm whether the base quote already includes removal, permit handling, inspection, disposal, venting, condensate drainage, controls, pumps, piping changes, and commissioning.

    A transparent planning example

    Assumptions:

    • Midpoint of the $95–$1,500 repair range: ($95 + $1,500) ÷ 2 = $797.50.
    • Replacement benchmark: $5,880 national average.
    • If permits are excluded, midpoint of $50–$300 = $175.
    • If removal is excluded, midpoint of $50–$200 = $125.
    • Illustrative replacement subtotal: $5,880 + $175 + $125 = $6,180.

    The gap between the repair midpoint and that replacement scenario is $5,382.50. That gap does not prove repair is correct. It shows why the repair diagnosis, remaining system condition, reliability, safety, and included replacement scope must be documented.

    This example excludes taxes, financing, new gas service, chimney or vent reconstruction, asbestos work, radiator replacement, extensive piping, electrical-panel work, and emergency temporary heat.

    When repair can make sense

    Repair deserves serious consideration when the failed part is identified, the heat exchanger or pressure vessel is sound, parts are available, the system has not developed a pattern of failures, and the repair restores expected performance.

    A written repair quote should list the part, labor, warranty, diagnostic fee, additional work that could be discovered, and post-repair testing. If the technician recommends a repair but expects another large component to fail soon, ask for that risk in writing.

    When replacement can make sense

    Replacement becomes more compelling when there are safety defects, leaks in a nonserviceable primary component, chronic breakdowns, unavailable parts, incompatible venting, poor sizing, or a major repair combined with other known deficiencies.

    Operating cost can matter, but do not assume a high-efficiency rating guarantees a short payback. Actual savings depend on climate, fuel price, system water temperature, controls, distribution losses, and the condition of the house.

    Safety limits

    Do not open fuel, combustion, electrical, or pressurized components based on an online diagnosis. If a carbon-monoxide alarm sounds, leave the building and follow emergency instructions. If you smell fuel, see active leakage near electrical components, or suspect unsafe venting, shut down only as directed by the manufacturer or emergency authority and call qualified help.

    NFPA advises annual heating-system inspection by a qualified professional and keeping combustible material away from heating equipment. Local licensing and permit rules vary.

    How to compare contractor quotes

    Ask each contractor:

    1. What exact fault or condition was diagnosed?
    2. Which tests support repair or replacement?
    3. What equipment capacity and calculation support the replacement size?
    4. Are boiler, burner, pumps, controls, expansion tank, and near-boiler piping included?
    5. Are venting, chimney liner, condensate drainage, and combustion air included?
    6. Are electrical and gas-line changes included?
    7. Are permits, inspection, removal, disposal, and startup included?
    8. Will existing radiators, baseboards, or steam components remain compatible?
    9. What warranties cover equipment, parts, and labor?
    10. What could become a change order?
    11. Is temporary heat included during downtime?
    12. Are rebates reflected, and is preapproval required?

    Bottom line

    Repair and replacement should begin with the same thing: a documented diagnosis. Use national ranges only to set expectations. Then compare the failed part, the rest of the system, downtime, safety, parts availability, and complete contractor scope.

    A $400 repair and a $5,880 replacement are not competing versions of the same job. The better decision is the one that resolves the actual failure, makes exclusions visible, and leaves the home with safe, reliable heat.

    Frequently Asked Questions

    How much does boiler repair cost in 2026?

    A current national planning range is about $95–$1,500, with average service costs around $425 in the cited guide. Fuel type, part, labor, and emergency timing matter.

    How much does boiler replacement cost?

    One current national range is $3,307–$8,464, averaging about $5,880. Larger homes, difficult access, fuel changes, venting, piping, and controls can raise the project.

    Should I replace a 15-year-old boiler?

    Age alone is not enough. Combine age with diagnosis, safety, parts availability, repair history, system compatibility, and the complete replacement scope.

    Is a boiler service the same as a repair?

    No. Service or maintenance may include cleaning, checks, and adjustments. A repair addresses a diagnosed failure and may require parts.

    Can I compare boiler quotes by equipment price?

    Not reliably. Compare capacity, efficiency, pumps, controls, piping, venting, electrical work, permits, removal, commissioning, warranties, and exclusions.

    Related reading

    Verification notes and sources

    Scope and review disclosure

    This article uses current public sources and transparent calculations. It is not a home inspection, load calculation, code determination, combustion-safety test, or contractor estimate. No direct testing or professional review is claimed.

  • Attic Air Sealing vs. Insulation Cost in 2026: Seal Leaks Before Adding R-Value

    Attic Air Sealing vs. Insulation Cost in 2026: Seal Leaks Before Adding R-Value

    Quick Answer

    Air sealing and insulation are not substitutes. Air sealing closes pathways that let conditioned air escape through the attic floor; insulation slows heat flow through the ceiling assembly. ENERGY STAR recommends completing attic air sealing before adding insulation. For planning, a professional air-sealing scope is commonly $250–$750, while professional attic insulation is commonly $1,700–$2,500, with a cited national average around $2,100. Removal, moisture repairs, wiring corrections, ventilation work, and hazardous-material handling can make the final price materially higher.

    The practical order is usually: diagnose moisture and safety issues, seal the attic floor, preserve required clearances and ventilation, then install insulation to a climate-appropriate R-value.

    Air sealing vs. insulation at a glance

    ScopeWhat it doesTypical planning rangeWhat can be missing
    Air sealingCloses leakage paths at penetrations, soffits, chases, hatches, and wall tops$250–$750Combustion testing, ventilation changes, insulation replacement, hazardous-material work
    Attic insulationAdds thermal resistance above the ceiling$1,700–$2,500; average about $2,100Air sealing, removal, vent baffles, electrical corrections, roof or moisture repairs
    Insulation removalRemoves damaged, contaminated, or obstructive material$1–$1.50 per sq. ft.Disposal surcharges, remediation, repair of the underlying cause
    Separate inspectionDocuments conditions and helps define scope$100–$300Diagnostic testing may be extra or included in another service

    These are national planning ranges, not bids. Location, attic size, access, climate target, material, existing depth, contamination, and contractor scope all matter.

    What air sealing fixes

    Insulation can slow heat transfer, but it does not reliably stop air moving through gaps. Common leakage locations include the attic hatch, wiring and plumbing penetrations, open wall cavities, dropped soffits, recessed fixtures, duct or flue chases, and kneewall framing.

    Dirty or darkened insulation can be a clue: air moving through fibrous insulation may filter household dust. Frost or staining can indicate warm, moist indoor air reaching cold surfaces. Those clues do not identify the entire repair by themselves, but they are useful questions for an inspection.

    A complete air-sealing quote should state which penetrations and bypasses are included, how existing insulation will be moved and restored, what materials will be used near heat sources, and whether testing is included.

    What insulation fixes

    Insulation adds resistance to heat flow. Its performance is expressed as R-value, but the right target depends on climate, assembly, and how much usable insulation already exists. A contractor should document the existing condition and the finished target rather than quoting only a number of bags or inches.

    Insulation also needs to be installed without blocking soffit vents or covering fixtures that require clearance. Around recessed lights, the IC rating matters. Around flues and chimneys, heat-safe clearances and materials matter. More insulation is not automatically better if it is installed over unresolved leaks, moisture, unsafe wiring, or blocked ventilation.

    Why sealing usually comes first

    Once fresh insulation covers the attic floor, the leakage paths underneath become harder to reach. Sealing first allows the contractor to expose and close bypasses, then restore or add insulation evenly.

    This sequence also makes the project easier to verify. Before insulation is added, the homeowner can ask for photos of sealed top plates, plumbing and wiring penetrations, dropped soffits, the attic hatch, and safe dams around heat-producing components. After insulation is installed, ask for photos showing depth markers, baffles, hatch treatment, and the finished coverage.

    A transparent 1,000-square-foot planning example

    Assumptions:

    • Midpoint air-sealing scope: ($250 + $750) ÷ 2 = $500.
    • Attic insulation: cited national average of $2,100.
    • Existing insulation can remain; no removal: $500 + $2,100 = $2,600.
    • If 1,000 square feet must be removed at the $1–$1.50 midpoint: 1,000 × $1.25 = $1,250.
    • With removal: $500 + $2,100 + $1,250 = $3,850.
    • If a separate inspection is also priced at the $100–$300 midpoint: add $200, for $4,050.

    This example excludes taxes, roof repair, mold or pest remediation, electrical work, vent rerouting, mechanical ventilation, asbestos testing or abatement, and utility-program requirements. An inspection may already be bundled into another scope, so do not automatically add it twice.

    How location and house conditions change the quote

    Climate affects the target R-value and the value of reducing heat loss or heat gain. Labor rates and disposal fees vary by market. A low-slope or obstructed attic can require more labor than an open attic of the same floor area. Kneewalls, multiple chases, recessed lights, and complicated additions can add sealing detail.

    Existing material matters too. Clean, dry insulation may be moved and restored. Wet, moldy, pest-contaminated, or vermiculite-like material changes the job. If vermiculite is present, do not disturb it casually; have the condition evaluated before proceeding.

    Safety conditions that should change the plan

    Pause the project and seek qualified help when you find wet insulation, roof leakage, mold or rot, bath or dryer exhaust terminating in the attic, insufficient ventilation, knob-and-tube wiring, vermiculite, or difficult access.

    Air sealing can also change how the house supplies combustion air. If the home has naturally vented gas- or oil-fired equipment, ask whether pre- and post-work combustion-safety testing is appropriate. Tighter construction can also affect indoor pollutants, so radon and ventilation may need attention.

    How to compare contractor quotes

    Ask every bidder to answer the same questions:

    1. What is the measured attic area, existing insulation depth, and estimated existing R-value?
    2. What finished R-value and material are included?
    3. Is attic-floor air sealing included, and which bypasses will be addressed?
    4. Will existing insulation be moved and restored?
    5. Are vent baffles, depth rulers, and attic-hatch treatment included?
    6. How will flues, chimneys, non-IC fixtures, and wiring be handled?
    7. Is insulation removal necessary, and what condition requires it?
    8. Are disposal, cleanup, permits, and taxes included?
    9. Is diagnostic testing or an energy assessment included?
    10. Are utility rebates available, and must approval occur before work begins?
    11. What photos or measurements will document completion?
    12. What workmanship and material warranties apply?

    Savings claims: use your house, not a slogan

    ENERGY STAR says air sealing combined with insulation can reduce annual energy bills in many homes, but a national percentage is not a guarantee for an individual property. A useful estimate should use the home’s recent utility bills, local weather, fuel and electricity rates, existing leakage, insulation levels, and the actual scope.

    If a contractor promises a fixed payback without showing assumptions, ask for the calculation in writing. Comfort, ice-dam risk, moisture control, and equipment runtime can matter even when the simple energy-payback period is long.

    When each scope may be enough

    Air sealing alone may be reasonable when insulation levels are already adequate and evenly installed, but testing or inspection identifies meaningful bypasses. Insulation alone is harder to justify when obvious leakage paths remain accessible underneath it. Both may be appropriate when the attic is leaky and under-insulated.

    Removal is not automatically required. Clean, dry material can often remain while targeted areas are moved for sealing. Removal becomes more likely with moisture damage, contamination, pests, unsafe materials, or when access to the air barrier is otherwise impossible.

    Bottom line

    Treat the attic as one system, but price the work in separate scopes. Diagnose moisture and safety conditions first. Seal the attic floor before burying the leakage paths. Then install insulation to a documented target without blocking ventilation or violating clearances. The best quote is not the one with the lowest total; it is the one that makes the finished assembly and exclusions easy to verify.

    Frequently Asked Questions

    Is air sealing included in an attic-insulation quote?

    Not necessarily. Some contractors include limited sealing while others price it separately. Ask for the exact penetrations and bypasses included, plus before-and-after documentation.

    Can I add insulation without removing the old material?

    Often, yes, if the existing insulation is dry, clean, compatible with the assembly, and not hiding a condition that needs correction. Removal may be warranted for moisture, pests, contamination, hazardous material, or access.

    How much does attic air sealing cost?

    A current national planning range is about $250–$750, but complex access, testing, heat-safe detailing, and ventilation changes can raise the scope.

    How much does attic insulation cost?

    A current professional planning range is about $1,700–$2,500, with a national average around $2,100. The attic area, material, climate target, access, and preparation determine the actual bid.

    Does more insulation stop drafts?

    Insulation can slow heat flow, but drafts often require air sealing. Fibrous insulation is not a reliable substitute for closing leakage paths.

    Should I get an energy audit first?

    It can help when the cause of discomfort or high bills is unclear, when several upgrades compete for the budget, or when a utility program requires testing. Confirm what testing and reporting the audit includes.

    Related reading

    Verification notes and sources

    Scope and review disclosure

    This article uses current public sources and transparent calculations. It is not a site inspection, energy model, building-code determination, hazardous-material assessment, or contractor estimate. No direct testing or professional review is claimed.

  • Foundation Crack Repair vs. Basement Waterproofing Cost in 2026: Diagnose Movement or Moisture First

    Foundation Crack Repair vs. Basement Waterproofing Cost in 2026: Diagnose Movement or Moisture First

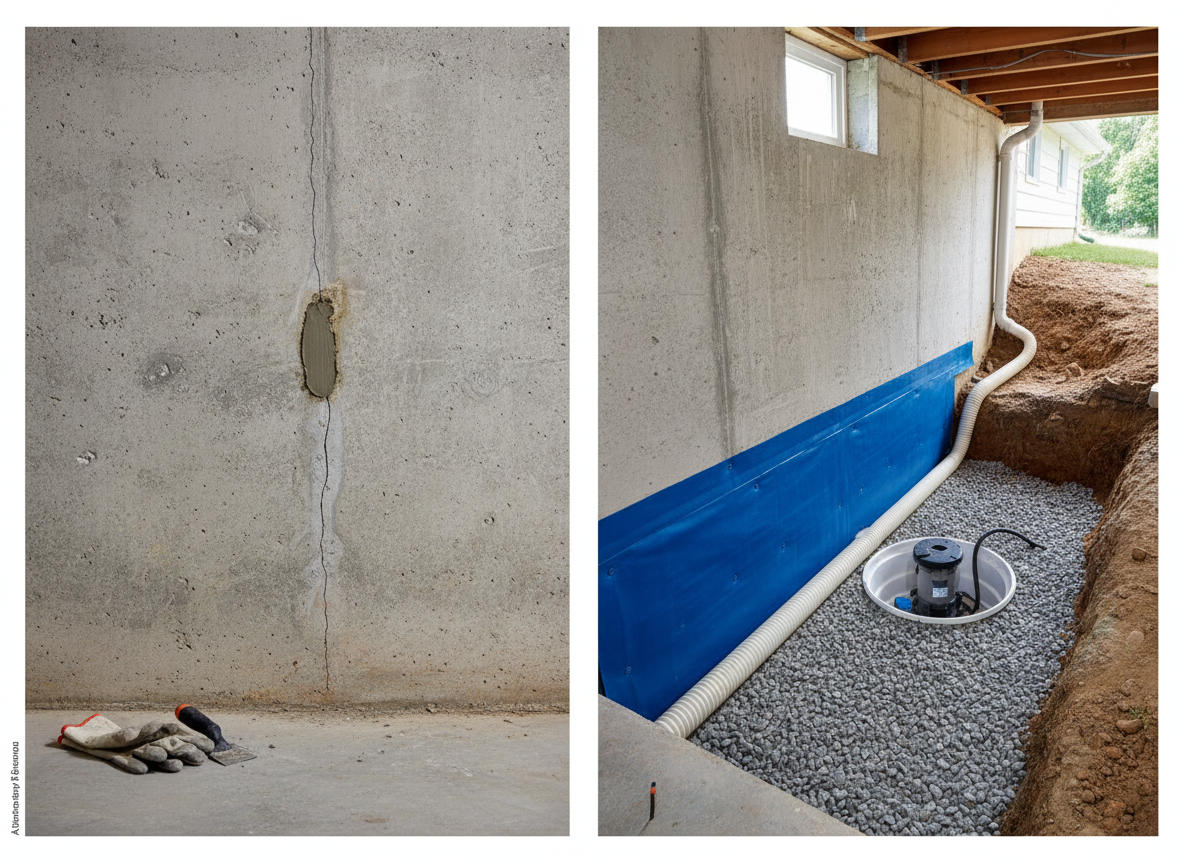
    Quick answer: Foundation crack repair and basement waterproofing are not interchangeable. Crack repair targets a defined opening or structural defect. Waterproofing manages how water reaches, crosses, or is collected around the foundation. Current national planning ranges overlap: broader foundation repair commonly runs about $2,225–$8,133, while basement waterproofing is about $2,461–$8,202. Minor foundation-crack repairs are often around $250–$800. That overlap is exactly why price alone cannot choose the work.

    Start by documenting the crack, when water appears, exterior drainage, wall movement, and whether the leak is active. A stable nonstructural crack may need a localized repair. Repeated seepage across a wall or floor joint may need drainage or waterproofing. Bowing, displacement, stair-step cracking, or a crack that is changing calls for an independent structural assessment before a waterproofing sales proposal.

    2026 Cost and Scope at a Glance

    OptionU.S. planning rangeWhat the price may coverWhat it may not cover
    Minor foundation crack repairAbout $250–$800Cleaning, injection, patching, or sealing one accessible crackStructural stabilization, drainage, finish restoration, engineering
    Broader foundation repair$2,225–$8,133Settlement, wall movement, reinforcement, piers, or multiple repairsWhole-basement waterproofing, landscaping, interior rebuild unless itemized
    Basement waterproofing$2,461–$8,202Sealants, interior drainage, sump work, exterior membrane, or combinationsStructural repair unless itemized, mold remediation, finish replacement
    Waterproofing by areaAbout $3–$10 per sq. ft.Planning estimate based on size and methodMajor excavation, structural stabilization, restoration unless included

    These are national planning ranges, not quotes. Foundation type, soil, basement size, access, finished surfaces, excavation, permits, engineering, and local labor can move the total substantially. Current Angi data also shows individual methods ranging from basic coatings to exterior excavation and interior drain systems, so a single “waterproofing” number can hide very different scopes.

    First Decide What Problem the Quote Is Supposed to Solve

    A crack can be a path for water, evidence of movement, or both. Water can also enter at the wall-floor joint, through porous masonry, around penetrations, over a window well, through a failed drain, or because roof runoff is collecting next to the foundation. Sealing the most visible crack does not prove that the water source has been corrected.

    EPA moisture guidance emphasizes source control. That includes maintaining gutters, directing downspouts away from the house, and grading the ground away from the foundation. EPA guidance for remodeling notes that some basement problems can be corrected with drainage changes, while others require more extensive exterior work or an interior drain-and-sump approach.

    Use This Decision Order

    1. Stop active hazards. Keep people away from standing water near electrical equipment. Treat sewage or contaminated water as professional cleanup work.
    2. Record the symptom. Photograph the crack with a ruler, mark the ends, note the date, and record whether water appears during rain, snowmelt, plumbing use, or dry weather.
    3. Check outside. Look for overflowing gutters, short downspouts, low spots, negative grading, blocked drains, and leaking hose bibs.
    4. Identify movement indicators. Bowing, displacement, uneven floors, doors that recently began sticking, or widening cracks justify an independent structural assessment.
    5. Compare remedies only after the target problem is written down.

    When a Localized Crack Repair May Fit

    A localized repair may be reasonable when the crack is accessible, appears stable, is not accompanied by meaningful displacement or other movement indicators, and the water path is limited to that crack. Exterior drainage problems should also be corrected or reasonably ruled out.

    The quote should name the crack location and length, preparation method, injection or sealant material, interior or exterior access, finish removal, curing conditions, and warranty. Ask whether the warranty covers only water through that treated crack or any future water in the basement. Those are not the same promise.

    When Waterproofing or Drainage May Fit

    Waterproofing or drainage work may be more appropriate when seepage occurs along a wall-floor joint, across multiple wall areas, through masonry, around several penetrations, or repeatedly after storms despite basic drainage corrections.

    “Waterproofing” is not one scope. A bid might mean exterior grading, gutter and downspout work, crack sealing, interior perimeter drainage, a sump pump, an exterior membrane, footing-drain replacement, or several of these. Require the contractor to explain where the water is expected to go before and after the work.

    Interior drainage and a sump system generally manage water after it reaches the foundation area. Exterior excavation and membrane work attempt to reduce water contact with the wall. One is not automatically better; access, soil, drainage, foundation type, climate, and failure mode matter.

    When to Separate Diagnosis From Sales

    Consider an independent structural engineer or qualified design professional when there is bowing, displacement, a changing crack, repeated structural repair, significant settlement, or disagreement about whether the wall is moving. A waterproofing contractor can be highly skilled at water management, but a proposal to sell one system is not the same as an independent structural opinion.

    Do not rely on crack direction alone. Horizontal, vertical, diagonal, or stair-step patterns can be informative, but the surrounding structure, width, displacement, history, materials, and soil conditions determine the significance.

    An 800-Square-Foot Planning Example

    Angi’s current national guide puts basement waterproofing at roughly $3–$10 per square foot on average. For an 800-square-foot planning example:

    • 800 sq. ft. × $3 = $2,400
    • 800 sq. ft. × $10 = $8,000

    That $2,400–$8,000 planning range is not directly comparable with, for example, a $600 one-crack repair. The first may represent a basement-wide water-management scope; the second may treat one opening. Before calling the smaller quote the better value, confirm that both proposals solve the same documented failure.

    Build a Same-Scope Comparison

    Quote itemWhat to ask for
    Diagnosis and testingMoisture mapping, crack monitoring, drain testing, and whether an engineer’s report is included
    Exact treatment areaCrack count and length, wall area, perimeter length, excavation length, affected rooms
    Water pathWhere water enters now and where it will drain after the work
    ComponentsMembrane, drainage board, pipe, gravel, sump basin, pump, battery backup, sealant, reinforcement, or piers
    Access and demolitionDrywall, insulation, flooring, patios, decks, driveways, landscaping, utility locating
    RestorationBackfill, compaction, grading, concrete, drywall, paint, flooring, cleanup
    Permits and inspectionsWho obtains them and whether fees are included
    WarrantyCovered failure, exclusions, transferability, maintenance requirements, remedy

    Questions to Ask Before Signing

    • What evidence shows that this is movement, a water-path problem, or both?
    • Which lower-cost exterior corrections were checked before proposing excavation or an interior system?
    • Does the scope treat one crack, one wall, or the entire perimeter?
    • If water appears somewhere else, is that covered?
    • Does the quote include finish removal and restoration?
    • Are engineering, permits, and municipal inspections included?
    • What maintenance does the warranty require?
    • What change-order conditions are most likely?

    Safety and Moisture Limits

    This guide cannot determine whether a foundation is structurally safe. Keep people away from standing water near electrical equipment and use professionals for sewage or contaminated water. EPA advises correcting the water source and drying wet materials promptly; cleaning or painting over mold without fixing moisture is not a complete solution.

    If the basement will be finished, correct moisture first. New drywall, insulation, flooring, or paint can conceal an unresolved problem and increase later demolition costs.

    Frequently Asked Questions

    Is every foundation crack structural?

    No. Some cracks are related to shrinkage or minor movement, while others are associated with structural displacement. Width, change over time, displacement, surrounding symptoms, foundation material, and site conditions matter. Use an independent assessment when movement is suspected.

    Will waterproof paint stop a basement leak?

    It may reduce minor dampness at a surface, but it does not correct failed grading, gutter overflow, hydrostatic pressure, a failed footing drain, or structural movement. Ask where the water will go after the proposed work.

    Should I repair the crack or improve drainage first?

    If exterior drainage is directing water toward the foundation, correct that source promptly. A crack may still need repair, but source control and crack treatment should be coordinated rather than treated as substitutes.

    Does homeowners insurance cover foundation or waterproofing work?

    Coverage depends on the cause and policy language. Gradual seepage, maintenance, and soil movement are often treated differently from a sudden covered event. Ask the insurer to cite the relevant policy section before assuming coverage.

    How many quotes should I get?

    For major work, obtain multiple written opinions based on the same documented problem and scope. Comparing different diagnoses as though they were identical bids creates false price comparisons.

    Related Reading

    More on crawl-space moisture work: If a waterproofing estimate also includes sealing the crawl space, see our vapor barrier vs. full encapsulation cost and scope comparison to separate ground moisture control, drainage, insulation and dehumidification before comparing bids.

    Sources and Scope

    Costs and guidance were checked September 18, 2026 against Angi’s 2026 foundation-repair cost guide, HomeAdvisor’s basement-waterproofing cost guide, Angi’s 2026 basement-waterproofing guide, and EPA moisture-control guidance. Repair scope and structural safety were not inspected or professionally reviewed for a specific property. This article provides planning guidance, not a structural diagnosis.

  • Septic Tank Pumping vs. Repair Cost in 2026: Maintenance or System Failure?

    Septic Tank Pumping vs. Repair Cost in 2026: Maintenance or System Failure?

    Quick answer: Routine septic tank pumping currently costs about $292–$565, with a national average near $428. A current Angi repair guide puts the more typical septic repair range around $627–$3,043, averaging about $1,829, while component-specific repairs can fall below or above that range. A professional septic inspection commonly costs about $100–$1,300, depending on the level of inspection, system size, access, and whether camera or other diagnostic work is added.

    Those are not interchangeable services. Pumping removes accumulated wastewater, sludge, and scum. It does not repair a broken baffle, failed pump, damaged line, leaking tank, or saturated drainfield. If the main symptom is sewage backup, standing effluent, a high-water alarm, repeated drainage trouble, or wet soil over the field, start with diagnosis rather than assuming another pump-out is the complete fix.

    2026 Septic Cost Snapshot

    ScopeU.S. planning rangeWhat it means
    Routine pumping$292–$565; average about $428Removes accumulated liquid and solids from the tank
    Standard to advanced inspectionAbout $100–$1,300Scope varies from routine condition checks to camera or detailed system evaluation
    Common septic repair range$627–$3,043; average about $1,829Varies by failed component, system type, access, labor, and permits
    Tank lid repair$150–$500Access-cover damage only
    Baffle repair$300–$900Inlet or outlet baffle work
    Filter repair/replacementAbout $200–$300Effluent filter work
    Pump repair/replacementAbout $250–$1,000Applies to systems with pumps; electrical diagnosis may add cost
    Septic line repairAbout $1,000–$4,200Pipe, access, excavation, and location drive the range
    Overflow cleanupAbout $7–$15 per sq. ft.Separate from fixing the system failure

    These are national planning figures, not a quote for a particular property. System type, tank size, household use, soil, groundwater, lot constraints, local permitting, excavation, landscaping, disposal rules, and emergency timing can materially change the final bill.

    What Pumping Actually Does

    Pumping removes accumulated wastewater and solids from the septic tank. That restores storage capacity and reduces the risk that excess solids will move into the drainfield. EPA says the average household septic system should be inspected at least every three years, and household tanks are typically pumped every three to five years. Systems with electrical floats, pumps, or other mechanical components generally need more frequent inspection, often annually.

    The interval is not universal. Household size, wastewater volume, tank capacity, garbage-disposal use, and measured sludge and scum levels all affect how often a tank should be pumped. A useful service record is better than relying on a calendar alone.

    When Pumping May Be Enough

    Pumping can be the correct scope when the system is due for routine maintenance and inspection does not identify a failed component or drainfield problem. In that situation, the service provider should still document what was found rather than treating the visit as a blind pump-out.

    • The tank is due for scheduled service.
    • No sewage is surfacing over the tank or drainfield.
    • No alarm or pump fault is active.
    • The tank, baffles, inlet/outlet piping, and filter appear serviceable.
    • The drainfield is accepting effluent normally.
    • The provider records tank size, amount removed, and observed condition.

    Pumping can also be part of a diagnostic visit because the tank may need to be emptied for inspection. That does not mean the pump-out itself corrected the cause of a backup or alarm. Ask the provider to separate maintenance, diagnosis, and repair on the invoice.

    When You Need a Repair Diagnosis

    Do not treat the following signs as a request for routine pumping only:

    • Sewage or wastewater backing up through multiple fixtures
    • Standing water, sewage, or persistently wet soil over the tank or drainfield
    • A high-water, pump, or control alarm
    • Broken lids, baffles, pipes, filters, pumps, wiring, or controls
    • Repeated slow drainage shortly after a recent pump-out
    • Bright green or unusually spongy growth over the field during otherwise dry weather
    • A documented leak, collapsed line, uneven distribution, or hydraulic failure

    Odor alone is not enough to identify the failed part. Plumbing traps, blocked vents, wind, the tank, or the drainfield can all contribute. The quote should connect a repair recommendation to a specific observation or measurement.

    What a Meaningful Inspection Should Cover

    Inspection depth varies by system type and local rules. For a major repair decision, ask whether the scope includes:

    • Available permit, design, pumping, and maintenance records
    • All tanks and compartments, including pump tanks where applicable
    • Sludge and scum measurements
    • Tank liquid level, leaks, corrosion, baffles, inlet/outlet piping, and filter condition
    • Pumps, floats, controls, alarms, wiring, and electrical connections
    • Distribution-box condition and whether laterals receive reasonably even flow
    • Signs of ponding, surfacing, compaction, roots, or groundwater at the drainfield
    • Camera work or excavation only where it answers a specific question
    • A written report with photos, measurements, defects, and recommended next steps

    Regional and Property Differences

    Angi’s current city examples show why a national average should not be used as a ZIP-code quote. Its pumping guide lists roughly $175–$275 in Minneapolis, $260–$350 in Denver, $360–$600 in Phoenix, and $440–$750 in Portland.

    Tank size also matters. Current examples range from about $250–$550 for a 750-gallon tank to $550–$1,250 for a 1,750-gallon tank. Buried lids, decks, fences, slopes, long hose runs, difficult winter access, and disposal distance can all add labor or travel cost.

    A Same-Scope Cost Example

    Consider two illustrative scenarios. These are worksheet assumptions, not market quotes.

    Routine service scenario: average pump-out $428 + lower-end inspection allowance $250 = $678.

    Failure scenario: average repair planning figure $1,829 + cleanup of 120 square feet at an assumed $10 per square foot ($1,200) = $3,029.

    The difference is $2,351. That does not predict anyone’s actual bill. It shows why a routine pump-out should not be compared directly with a repair quote that includes failed components and contaminated-area cleanup. Permits, excavation, landscaping, electrical work, or system redesign could add more.

    Questions to Ask Before Approving Work

    • Is this quote for pumping, inspection, diagnosis, repair, or cleanup?
    • How many tanks and compartments are included?
    • What tank size and gallons removed will be documented?
    • Are lid locating, digging, riser work, hose distance, and disposal included?
    • Will sludge and scum levels be measured and recorded?
    • Which component is defective, and what observation supports that conclusion?
    • Are the distribution box, laterals, drainfield, pumps, alarms, and electrical controls part of the inspection?
    • Does local regulation require a permit, licensed designer, soil evaluation, or health-department approval?
    • What excavation and yard restoration are excluded?
    • Is cleanup priced separately from the system repair?
    • What parts, labor, and performance warranties apply?
    • Will the contractor provide photos, measurements, and a written service record?

    Safety and Environmental Limits

    Avoid contact with sewage. Backups can contain harmful pathogens, and local health or environmental authorities may have specific cleanup guidance. Keep people and pets away from affected areas and use qualified cleanup help when contamination is present.

    Do not enter a septic tank. Tanks are confined spaces with toxic-gas and collapse hazards. Do not drive or park heavy equipment over the drainfield, and keep roof drains and sump-pump discharge away from it. Local onsite-wastewater rules control acceptable repair and replacement methods.

    Frequently Asked Questions

    Will pumping fix a slow drain?

    Sometimes, but not reliably without diagnosis. A full tank can contribute, while a building drain clog, damaged line, blocked filter, failed pump, or drainfield problem can produce similar symptoms.

    How often should a septic tank be pumped?

    EPA’s general household guidance is every three to five years, adjusted for tank size, household size, wastewater volume, garbage-disposal use, and measured solids. Alternative systems often need more frequent inspection.

    Is a septic inspection included with pumping?

    Not automatically. A provider may make basic condition observations during pumping, while a real-estate transfer inspection or full system evaluation can be a separate, more detailed service. Compare the written scope.

    Does bad odor mean the drainfield failed?

    No. Odor can come from vents, traps, wind conditions, the tank, or the drainfield. The exact cause should be diagnosed before authorizing a major repair.

    Can additives replace pumping?

    No. Additives do not remove accumulated solids or substitute for inspection. Check local rules before using any chemical or biological treatment product.

    Related Reading

    Sources and Scope

    Costs and guidance were checked September 17, 2026 against EPA’s septic-system care guidance, Angi’s septic pumping guide, Angi’s September 2026 septic repair guide, and Angi’s septic inspection guide. This article does not claim a property inspection, pump-out, repair, cleanup, engineering review, local regulatory approval, or professional diagnosis for a specific system.

  • Sewer Line Repair vs. Replacement Cost in 2026: Clear, Repair, or Replace?

    Sewer Line Repair vs. Replacement Cost in 2026: Clear, Repair, or Replace?

    Quick answer: Main sewer-line clearing commonly costs about $187–$569, with an average near $376. If the pipe itself is structurally damaged, a localized repair may run roughly $1,000–$4,000. Full sewer-line replacement averages about $3,319, with a common national planning range of roughly $1,388–$5,323. Long, deep, difficult, or restoration-heavy projects can reach $3,000–$25,000. Trenchless lining often falls around $1,900–$6,000, averaging about $2,900.

    The first decision is not “repair or replace?” It is “Is this a blockage, or is the pipe damaged?” Paying for a camera inspection and written diagnosis before comparing large repair quotes can keep a clog-clearing problem from being priced like a structural replacement—or keep a temporary clearing from being mistaken for a permanent fix.

    2026 Sewer Line Cost Snapshot

    ScopeU.S. planning rangeWhat the price should clarify
    Main sewer-line clearing$187–$569; average about $376Method, access point, severity of blockage
    Sewer camera inspectionAbout $200–$1,300Video, footage location, written findings
    Localized structural repairAbout $1,000–$4,000Defect, depth, access, excavation and restoration
    Full sewer-line replacement$1,388–$5,323; average about $3,319Length, depth, material, excavation and restoration
    Broader high-cost replacementAbout $3,000–$25,000Long/deep runs, difficult access, street or hardscape work
    Trenchless lining$1,900–$6,000; average about $2,900Pipe condition, access points, lining length and warranty
    Trenchless workAbout $50–$250 per linear footMethod and whether prep/restoration is separate
    ExcavationAbout $5–$12 per linear footSoil, depth, equipment access
    BackfillAbout $11–$19.50 per linear footMaterial and compaction requirements
    Driveway excavation/restorationAbout $5–$12 per sq. ft.Demolition versus finished restoration scope

    These are national planning ranges, not a quote for a specific property. Sewer work varies sharply with pipe depth, total footage, access, soil, material, municipal rules, private-versus-public ownership boundaries, and how much driveway, sidewalk, landscaping, or street work must be restored.

    Start With a Diagnosis, Not a Service Name

    A backed-up drain can be caused by a removable obstruction, roots, a separated joint, a belly, corrosion, a partial collapse, or another defect. Those conditions do not justify the same work.

    Before approving a structural repair, ask for the camera findings in a form you can compare. Useful documentation includes:

    • The approximate footage from the access point to the defect
    • Pipe material and estimated diameter
    • Depth where the work is expected
    • Whether the problem is roots, offset joints, a belly, cracking, corrosion, or collapse
    • Video or still images showing the defect
    • Whether the camera reached the municipal connection or was blocked
    • The exact section the proposed repair is intended to address

    A clearing service removes a blockage. It does not automatically repair a broken pipe. Conversely, a visible defect does not automatically mean the entire private sewer lateral must be replaced. The useful quote is the one that ties the proposed scope to a documented condition.

    When Clearing May Be Enough

    Clearing is the logical first service when inspection suggests the pipe remains structurally serviceable and the immediate problem is a blockage. The key question is what caused that blockage and whether it is likely to recur.

    • A removable obstruction is found without visible structural failure.
    • The pipe remains open and continuous after cleaning.
    • No major offset, collapse, severe corrosion, or persistent belly is documented.
    • The contractor can explain whether roots or recurring buildup require monitoring.

    Repeated clearing bills can still become expensive. If the same section blocks repeatedly, ask whether a camera inspection after cleaning shows an underlying structural cause rather than continuing to compare only the price of another clearing visit.

    When a Localized Repair Makes More Sense

    A localized repair can be reasonable when the defect is confined to a short section and the remaining pipe is in usable condition. Examples can include a damaged joint, a short cracked section, or a specific intrusion point that can be accessed without replacing the entire run.

    The quote should identify exactly how many feet are being repaired, how the contractor will reach the defect, what material will be installed, and what surfaces will be restored afterward. A $2,000 repair that excludes driveway or landscape restoration is not directly comparable with a $3,000 quote that includes both.

    When Trenchless Lining May Fit

    Trenchless lining can reduce excavation when the existing pipe has a condition that can accept a liner and there is suitable access. Current Angi planning data puts trenchless sewer replacement or lining around $1,900–$6,000, averaging about $2,900, with broad per-foot estimates around $50–$250.

    “Trenchless” does not mean “no digging,” and lining is not appropriate for every failed pipe. Severe collapse, major deformation, incompatible conditions, or access limitations may require excavation or another method. Ask the contractor to explain why the existing pipe is a candidate rather than treating trenchless work as the default upgrade.

    When Full Replacement Deserves a Quote

    Full replacement becomes more reasonable when damage is extensive, several sections have failed, the line is severely deteriorated, a collapse prevents rehabilitation, or repeated localized work would leave a long run of known weak pipe.

    • Multiple defects are documented along the run.
    • A section is collapsed or badly deformed.
    • Severe deterioration makes a liner unsuitable.
    • Access work is already extensive enough that replacing a longer section may avoid repeat excavation.
    • Local requirements or the connection layout materially change the repair method.

    Do not compare the pipe-installation number alone. On many properties, the difference between a manageable replacement and a very expensive one is the restoration scope above the pipe.

    Put Every Quote on the Same Scope

    Quote itemWhat to ask for
    DiagnosisCamera video, defect type, footage and depth
    Pipe workLength, diameter, material and exact repair method
    AccessCleanout work, digging, equipment access and traffic control
    ExcavationIncluded linear footage, soil assumptions and shoring if applicable
    RestorationBackfill, compaction, lawn, landscaping, driveway, sidewalk or street
    PermitsWho obtains them and whether fees are included
    Responsibility boundaryWhere homeowner responsibility ends and utility/municipal responsibility begins
    WarrantyWhat is covered, for how long, and exclusions

    A contractor quoting only the underground pipe is not necessarily cheaper than one quoting the whole project. Normalize exclusions before comparing totals.

    Illustrative Cost Scenario

    Suppose a homeowner receives the following planning numbers. These are an illustration, not a market quote:

    • Clearing: $450
    • Camera inspection: $500
    • Localized structural repair: $2,500
    • Trenchless lining alternative: $4,800
    • Excavation replacement: $6,500
    • Driveway and landscaping restoration after excavation: $1,500

    The diagnostic first step would total $950 for clearing plus the camera. If the pipe is structurally sound afterward, that may be the complete project. If the camera documents a localized defect, the $2,500 repair becomes the relevant comparison. If full excavation is necessary, the complete replacement scenario is $6,500 + $1,500 = $8,000, not $6,500.

    The point is not that one method is always cheapest. It is that the condition of the pipe and the complete restoration scope determine which prices are actually comparable.

    Regional and Property-Specific Cost Drivers

    Two houses with the same length of failed pipe can receive very different bids. Major drivers include depth, soil, local labor, permit rules, access for excavation equipment, proximity to trees or structures, groundwater, pipe material, driveway or sidewalk crossings, street-opening requirements, and the amount of finished landscaping that must be rebuilt.

    Also confirm the legal or utility responsibility boundary before authorizing work. In some jurisdictions, a homeowner is responsible for a private lateral up to a defined connection point; in others, specific portions or defects may fall under municipal or utility responsibility. National cost guides cannot resolve that local boundary.

    Safety and Sanitation Limit

    Sewer backups can expose occupants to sewage, contaminated surfaces, and potentially hazardous gases. Excavations add collapse, buried-utility, equipment, and traffic hazards. This guide is for cost and quote comparison; it is not a DIY excavation or confined-space procedure. Active sewage exposure, unstable excavation, suspected utility conflicts, or unsafe access should be handled by qualified professionals and the appropriate local service or utility.

    Questions to Ask Before Signing

    • What exactly did the camera show, and at what footage?
    • Is the problem a blockage, a localized defect, or widespread deterioration?
    • How many feet of pipe are included in this quote?
    • What pipe material and diameter will be installed?
    • Why is this repair method appropriate for the observed condition?
    • What excavation, backfill, compaction and restoration are included?
    • Are driveway, sidewalk, landscaping or street repairs excluded?
    • Who is responsible for permits and inspections?
    • Where does homeowner responsibility end?
    • What workmanship and material warranties apply?

    Frequently Asked Questions

    Does snaking or hydro jetting repair a broken sewer line?

    No. Clearing can remove an obstruction, but it does not rebuild a cracked, collapsed, badly offset, or severely deteriorated pipe. A post-cleaning camera inspection can help distinguish those situations.

    Is trenchless sewer repair always cheaper?

    No. It can reduce excavation and surface restoration, but suitability, access, pipe condition, total footage, and local pricing matter. Compare the complete project scope rather than the method name.

    Why can sewer replacement reach $25,000?

    High-cost projects can involve long or deep runs, difficult excavation, poor access, street or hardscape work, complex permits, dewatering, or major restoration. The broad high-end range should not be treated as a typical quote.

    Should I get a camera inspection before replacement?

    For a major repair decision, documented camera findings are useful whenever the pipe can be inspected. Ask for the defect location and what the video does—and does not—show.

    Related Reading

    Sources and Scope

    Prices and scope were checked September 16, 2026 against HomeAdvisor’s sewer-line cleaning guide, HomeAdvisor’s sewer-main repair guide, HomeAdvisor’s sewer-main installation guide, and Angi’s trenchless sewer-line cost guide. Published national ranges use different scopes and assumptions, so they are planning references rather than local bids. This article does not claim an on-site inspection, contractor review, or diagnosis of a specific property.

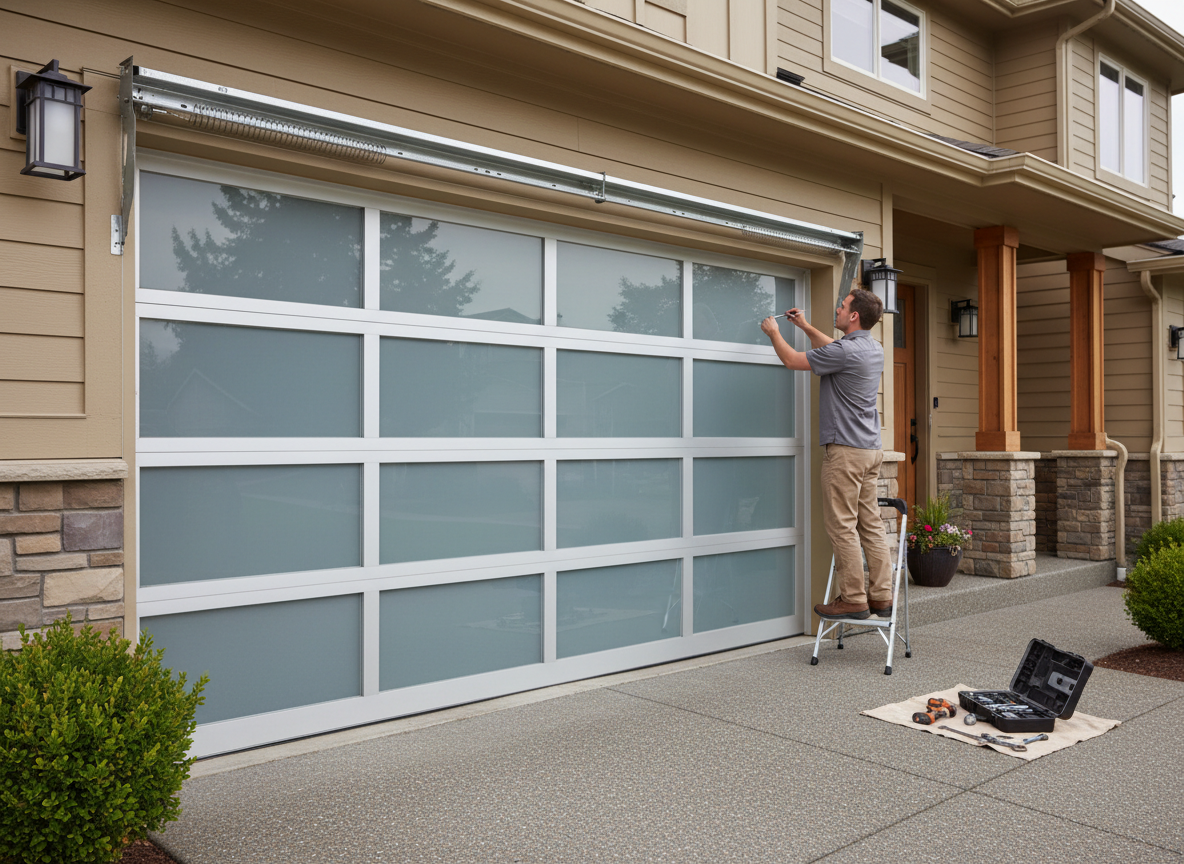
  • Garage Door Repair vs. Replacement Cost in 2026: What to Fix, What to Replace

    Garage Door Repair vs. Replacement Cost in 2026: What to Fix, What to Replace

    Quick answer: A typical professional garage-door repair costs about $155–$379, with an average near $265. For replacement, Angi’s August 2026 national data puts many projects around $754–$1,707, averaging about $1,230. Broader published ranges can stretch from a few hundred dollars to several thousand because door size, material, insulation, custom design, tracks, hardware, opener work, removal, and local labor can radically change the scope.

    The useful decision is not “repair price versus door price.” Compare the complete repair scope with the complete installed replacement scope. Repair is usually the better starting point when one serviceable component has failed and the door sections, tracks, framing, and balance remain sound. Replacement deserves a same-scope quote when several major components are worn, panels are badly damaged or unavailable, the door is warped or corroded, or the new assembly needs compatible tracks, springs, and opener hardware.

    2026 Garage Door Cost Snapshot

    ScopeU.S. planning rangeWhat to verify
    Typical professional repair$155–$379; average about $265Diagnosis, labor, parts, and service fee
    Panel repair or replacement$250–$1,000Matching section, finish, shipping, adjacent damage
    Opener repair$100–$500Motor, rail, controls, sensors, and labor
    Common replacement project$754–$1,707; average about $1,230Door, basic installation, tracks, removal, and add-ons
    One-car replacementAbout $500–$3,000Material, insulation, windows, and hardware
    Double-width door replacementAbout $800–$5,000Door weight, spring system, tracks, and labor
    Old-door removalAbout $50–$200Whether hauling and disposal are included

    These are national planning ranges, not bids for a particular ZIP code. Angi updated its garage-door repair and replacement cost guides on August 3, 2026. NerdWallet’s February 2026 review similarly places many installed replacements around $750–$1,700. HomeAdvisor publishes a much broader replacement range that reaches custom and high-end projects. Treat that broader spread as a reminder to normalize scope—not as a typical price for every home.

    Repair Is Usually the Better Starting Point When

    Start with a repair quote when the problem is isolated: a broken spring, damaged cable, misaligned track, worn roller, sensor issue, opener fault, or one replaceable panel. The rest of the assembly should be stable, correctly sized, and free of widespread corrosion, cracking, or deformation.

    • The door still moves squarely in the opening.
    • Matching panels and hardware are available.
    • The door’s weight remains appropriate for the spring and opener system.
    • The failure is recent rather than part of a repeating pattern.
    • The contractor can explain the root cause, not just the visibly broken part.
    • The repair does not leave a known safety defect elsewhere in the assembly.

    A low repair estimate can be misleading if it fixes only the symptom. A frayed cable, for example, can be related to a damaged drum, poor track alignment, or an incorrectly balanced spring system. Ask what caused the failure and what else was inspected.

    Replacement Deserves a Same-Scope Quote When

    Request a complete replacement quote when multiple major parts are near the end of service, the sections are warped or extensively rusted, impact damage affects more than one section, or compatible replacement panels are no longer available.

    • Tracks, springs, rollers, cables, and hardware would all need substantial work.
    • The door no longer seals or sits squarely because the sections are distorted.
    • A heavier or differently constructed door requires a new spring system.
    • The existing opener is not compatible with the proposed door’s size or weight.
    • Wind-load requirements affect the door and supporting hardware.
    • Repeated service calls are accumulating without restoring reliable operation.

    Appearance alone does not make replacement mandatory. A cosmetic upgrade can still be worthwhile, but it should be treated as an elective improvement rather than an unavoidable repair.

    Put Both Quotes on the Same Scope

    Quote itemAsk the contractor to show
    Door or panelsManufacturer, model, material, insulation level, windows, and finish
    Tracks and hardwareWhat is reused versus replaced
    Springs and cablesExact parts, matched-pair logic, and balance setup
    OpenerModel, rail, controls, sensors, and compatibility
    Removal and disposalWhether old-door removal, hauling, and disposal are included
    House workFraming, trim, weatherstripping, painting, and electrical work
    Local requirementsPermit, inspection, wind-load, delivery, and tax
    WarrantyProduct, labor, and return-visit coverage

    “Installed” does not always mean the same thing. One quote may include tracks, removal, and an opener; another may cover only the door and installation labor. Normalize the line items before comparing totals.

    A Simple Repair-vs.-Replacement Calculation

    Consider an illustrative—not market-average—scenario. A contractor quotes $325 for a spring repair plus a $95 service fee that is not credited toward the work:

    $325 + $95 = $420 repair total

    Now compare a replacement quote with a $1,800 installed stock door, a $400 opener, and $100 for removal:

    $1,800 + $400 + $100 = $2,300 replacement total

    The immediate difference is $1,880. That does not automatically make repair correct. The comparison only works if the $420 repair restores a safe, serviceable system without leaving major near-term work. If the repair also requires tracks, cables, panels, and an opener, compare that combined total with the complete replacement scope.

    Regional and House-Specific Cost Drivers

    Labor rates, permit rules, product availability, wind-load requirements, disposal fees, and travel time vary by market. Door width, ceiling clearance, framing condition, electrical access, and whether the garage is attached can also change the work. National ranges are most useful for preparing questions; a local written quote is the correct source for your project price.

    Safety Limit

    Garage doors are heavy, and springs and cables store substantial energy. Do not loosen, cut, wind, or release high-tension components unless you are trained and equipped for that system. If a spring, cable, track, or bracket is damaged, stop operating the door and keep people and vehicles clear until it is assessed.

    Questions to Ask Before Signing

    • What failed, and what caused it?
    • Which parts are included by manufacturer and model?
    • Are both springs being replaced, or only the failed spring?
    • Are the existing tracks and opener compatible with the proposed door?
    • Does the total include removal, disposal, delivery, tax, and permit fees?
    • Is framing or electrical work excluded?
    • What labor and product warranties apply?
    • If a matching panel is unavailable, what alternatives were priced?
    • Will the door be balanced and the reversal system tested after the work?

    Frequently Asked Questions

    Is a $1,500 garage-door replacement budget reliable?

    It can be a useful planning number, but it is not a guaranteed project price. Current national sources cluster many common replacements around roughly $750–$1,700, while custom doors and complex installations can cost much more.

    Does a new garage door include a new opener?

    Not necessarily. Many quotes list the opener separately. Ask for the opener model, controls, rail, sensors, installation, and compatibility in writing.

    Can one damaged panel be replaced?

    Sometimes. Panel work commonly falls around $250–$1,000, but availability, finish matching, shipping, and damage to adjacent sections can make full replacement more practical.

    Should both garage-door springs be replaced?

    It depends on the spring system, age, cycle history, and manufacturer requirements. Ask the technician whether the springs are a matched pair and why the quote includes one or both.

    Is garage-door repair a DIY job?

    Cleaning photo eyes or checking whether an opener is unplugged can be low risk, but spring, cable, track, and bracket work can be hazardous. High-tension and structural components are better left to a qualified garage-door professional.

    Related Reading

    Sources and Scope

    No on-site inspection, hands-on test, contractor review, or quote for a specific property is claimed. National planning ranges were checked September 15, 2026 against Angi’s garage-door repair cost guide, Angi’s replacement cost guide, HomeAdvisor’s garage-door pricing guide, and NerdWallet’s installation-cost review. Published national ranges differ because scope and product tier differ. Local written quotes should control the actual decision.

  • Water Heater Repair vs. Replacement Cost in 2026: Compare the Failed Part, Not Just Age

    Water Heater Repair vs. Replacement Cost in 2026: Compare the Failed Part, Not Just Age

    This guide compares water-heater repair and replacement costs, scope, safety limits and quote questions for U.S. homeowners.

    Quick answer: Professional water-heater repair commonly runs about $228–$1,017, while standard replacement commonly runs about $882–$1,825. A tankless installation is a different project, with current planning ranges around $1,406–$3,901. The decision should start with the failed part, tank condition and quote scope—not age alone.

    Repair vs. Replacement

    OptionPlanning rangeKey question
    Professional repair$228–$1,017What failed, and is the tank itself sound?
    Standard replacement$882–$1,825What is included beyond the unit?
    Tankless installation$1,406–$3,901Does the home need gas, venting or electrical upgrades?

    Repair deserves consideration when the tank body is intact and the diagnosis points to a serviceable component. Replacement becomes more reasonable when the tank leaks, corrosion is extensive, failures recur, parts are unavailable or the installation needs major correction.

    Normalize the Quote Scope

    • Model, capacity, fuel type, efficiency rating and warranty
    • Removal and disposal
    • Labor and expected downtime
    • Permit and inspection
    • Drain pan, expansion tank and pressure work
    • Venting, electrical or plumbing work
    • Diagnostic fee and whether it is credited

    Illustrative Scenario

    Assume a $650 repair plus a $125 diagnostic fee, for a total of $775. A comparable same-type replacement is $1,550 plus $350 of code-related work and a $100 permit, for $2,000. The $1,225 difference is useful context, but it does not prove the repair is the better choice. Tank condition, failure history, warranty and downtime still matter.

    Questions to Ask

    • What component failed?
    • Is the tank body leaking or meaningfully corroded?
    • Is the repair expected to be durable?
    • Which model and efficiency rating are quoted?
    • Is this a same-type replacement or a conversion?
    • Are permit, haul-away, venting, electrical and finish work included?
    • What parts and labor warranties apply?

    FAQ

    Is an old water heater automatically a replacement?

    No. Age is a planning signal, not a diagnosis.

    Can flushing fix a leaking tank?

    No. Flushing is maintenance and does not restore a leaking tank shell.

    Related Reading

    Sources and Scope

    No inspection, test or installation is claimed. The benchmarks come from HomeAdvisor’s repair guide ($228–$1,017), replacement guide ($882–$1,825) and tankless installation guide ($1,406–$3,901). All three show an update date of June 17, 2026 and were accessed September 14, 2026 KST; their page headings still say 2025. These are national project-cost benchmarks, not unit-only prices or local quotes. Do not assume permits, haul-away or utility upgrades are included in every quote. Local quotes, equipment type and actual failure diagnosis should control the decision.

    Can your repair reserve cover the bill when it is due? Using the illustrative $2,000 replacement total above, an $800 reserve leaves a $1,200 cash gap ($2,000 − $800). Saving $100 each month would fill that gap in 12 months, but those future deposits are not available for a bill due now. Write down the payment deadline, reserve available today, and any deposits that will clear before that deadline. For future breakdown planning, compare a home service contract with a repair fund, including service fees and uncovered costs. This example is cash-flow arithmetic, not a local price quote or a recommendation to delay necessary work.

  • Roof Repair vs. Replacement Cost in 2026: How to Decide From the Scope

    Roof Repair vs. Replacement Cost in 2026: How to Decide From the Scope

    Quick answer: HomeAdvisor’s roof-repair guide puts a typical roof repair at $395–$1,967, averaging about $1,173. Angi’s roof-replacement guide reports that full roof replacement averages about $9,608, with a much wider planning range of roughly $5,902–$46,000 depending on size, material, pitch, height and location. Those numbers do not tell you which option your roof needs—the damage scope does.

    Localized flashing, shingle or small leak repairs can favor repair. Widespread damage, repeated failures, deteriorated decking or a roof near the end of its service life can shift the decision toward replacement. Start with an inspection and a written scope, not the roof’s age alone.

    Repair vs. Replacement: Same Roof, Different Scope

    ConditionLikely directionWhat to verify
    Localized missing or damaged shinglesRepair may be reasonableUnderlayment and decking condition
    Single flashing failureRepairWater path and adjacent materials
    Repeated leaks in multiple areasBroader evaluationSystemic wear vs. isolated workmanship
    Widespread storm damageReplacement may be more practicalDamage percentage, material availability, insurance scope
    Soft or deteriorated deckingScope can expand quicklyHow much decking replacement is included

    What the 2026 Cost Benchmarks Mean

    HomeAdvisor’s roof-repair guide reports $395–$1,967 as a common roof-repair range, with an average around $1,173. Angi’s roof-replacement guide reports a $9,608 average, but replacement can vary from about $5,902 to $46,000 because roof area, material and complexity dominate the bill.

    Do not compare a $1,173 repair average with a $9,608 replacement average as if they are interchangeable choices. A repair quote and a replacement quote may address completely different quantities of damaged material.

    Ask for the Scope Behind the Number

    • How many square feet or roofing squares are affected?
    • Which shingles, panels, tiles or membrane areas are being removed?
    • Is underlayment replacement included?
    • Is damaged decking priced per sheet or included as an allowance?
    • Are flashing, vents and penetrations included?
    • Does the quote include tear-off, disposal and permits?
    • What happens if hidden water damage is found?
    • How will new materials match existing materials?
    • What workmanship and material warranties apply?

    Why Location and Material Matter

    Labor rates, permit requirements, disposal costs, roof pitch, height, access and local material pricing vary substantially. Asphalt shingles, metal, tile, slate and low-slope membrane systems should not share one simplistic cost assumption.

    Inspection Before a Big Decision

    An inspection is most useful when it identifies the failure mechanism and extent of damage. Ask for photographs and written findings. For a high-cost replacement recommendation, a second independent quote can help distinguish a genuinely system-wide problem from a repairable localized issue.

    Illustrative Decision Scenario

    Suppose Quote A proposes a $1,400 localized flashing and shingle repair. Quote B proposes a $12,000 replacement but includes tear-off, underlayment, new flashing and a decking allowance. These are not comparable until the inspection explains whether the damage is localized or widespread. The lower price is not automatically the better decision, and the higher price is not automatically necessary.

    FAQ

    How much does roof repair cost in 2026?

    HomeAdvisor’s roof-repair guide reports a common range of $395 to $1,967, averaging about $1,173. Material, damage type and access can move the total substantially.

    How much does roof replacement cost?

    Angi reports an average around $9,608, with a broad planning range from roughly $5,902 to $46,000 depending on roof size, material, pitch and location.

    Should I replace a roof just because it is old?

    Age is one input, not the diagnosis. Condition, leak history, material, decking, flashing and remaining serviceability should drive the decision.

    Related Reading

    Sources and Scope

    U.S. homeowner planning guide. No roof was personally inspected. Repair benchmarks come from HomeAdvisor’s roof-repair guide (updated June 19, 2026); replacement benchmarks come from Angi’s roof-replacement guide (updated March 5, 2026). Both were accessed September 14, 2026 KST. These are different national project-cost benchmarks, not competing quotes for the same roof. Confirm tear-off, disposal, permits and decking allowances separately; local quotes, material and actual damage scope should control the decision.