Category: Cost Guides

  • Dryer Repair vs. Replacement Cost in 2026: Diagnose the Failure First

    Dryer Repair vs. Replacement Cost in 2026: Diagnose the Failure First

    Quick Answer

    Repair the dryer when a qualified diagnosis identifies a replaceable part, the cabinet and drum are sound, and the written repair total is meaningfully below the complete installed replacement cost. Replace it when there is severe cabinet or drum damage, recurring major failures, unsafe electrical or gas damage, unavailable parts, or a repair total too close to a like-for-like replacement.

    Current U.S. planning guides put professional dryer repair at $100–$430, with an average around $180. Homewyse’s May 2026 planning model starts electric-dryer replacement at $955–$2,056 per dryer under basic, readily serviceable conditions. Those figures are different kinds of estimates—not local quotes—and replacement can also include delivery, installation, a cord or connector, vent work, haul-away, and any utility correction.

    Start with the failure, not the age. A long drying time can be a blocked vent rather than a failed appliance. A no-heat complaint can come from power, airflow, a thermostat, a thermal fuse, a heating element or gas-ignition components. Ask the technician to identify the failed component and show which charges are credited if you approve the repair.

    Repair and Replacement Are Different Scopes

    OptionCurrent planning figureScope to confirm
    Professional diagnosis and repair$100–$430 typical repair range; about $180 averageService call, diagnosis, part, labor, return visit, testing and warranty
    Electric dryer replacement$955–$2,056 in Homewyse’s May 2026 basic-work modelDryer, delivery, removal, utility and vent connections, leveling, testing and cleanup
    Vent cleaning or duct correctionSeparate job unless the quote says otherwiseFull route, exterior termination, transition duct, access and airflow verification

    HomeAdvisor’s repair range includes many different failures and locations. Homewyse describes its replacement number as an example estimate for basic midrange work, not a bid for every home. Use both only to frame questions, then compare written local estimates with matching scope.

    Diagnose the Symptom Before Pricing a Solution

    SymptomWhat a useful diagnosis should separateDo not assume
    No heatCorrect supply, airflow, thermal protection, thermostat, electric heating element or gas ignition, controlsThat the heating element is automatically at fault
    Drum does not turnBelt, idler, rollers, motor, door switch, obstructionThat a broken belt explains every no-tumble complaint
    Long dry timeLoad and cycle, lint screen, full vent route, heat output, moisture sensorThat replacing the dryer will fix a restricted duct
    Loud noiseForeign object, rollers, idler, blower, bearing, motorThat noise alone proves a major motor failure
    Shuts off or overheatsAirflow, thermostat, motor heat, wiring, control faultThat resetting and continuing to run it is safe
    Sparks, smoke or burning odorStop use and arrange qualified electrical or appliance diagnosisThat vent cleaning alone resolves an electrical fault

    The U.S. Consumer Product Safety Commission warns that lint in a dryer or exhaust duct can restrict airflow, create excessive heat and contribute to fire. If clothes remain damp or drying takes longer, CPSC says the lint screen or exhaust duct may be blocked. That is why an appliance quote and a vent-service quote must not be treated as interchangeable.

    What a Repair Quote Should Include

    • The service-call or diagnostic fee and whether it is credited toward approved work.
    • The exact failed part and the test or observation supporting the diagnosis.
    • Part brand or grade, price and availability.
    • Labor, including whether a second visit is expected.
    • Access charges for a stacked, built-in or tight installation.
    • Any gas-appliance, electrical or vent work that is excluded.
    • Operational and safety testing after the repair.
    • Parts and labor warranty terms.
    • Taxes, disposal and any trip charge.

    A parts-only table is not a finished repair estimate. For example, HomeAdvisor lists lower prices for several components, but the customer’s total can also include diagnosis, labor, access and a return visit. Ask for the complete authorized total before deciding.

    What a Replacement Quote Should Include

    • The exact model and capacity, not just “similar dryer.”
    • Delivery, stairs or long-carry charges.
    • Removal and haul-away of the old appliance.
    • A required cord, plug, gas connector or conversion part.
    • Connection to existing utilities and the dryer vent.
    • Any correction to an unsafe, damaged or incompatible connection.
    • Stacking kit, door reversal or trim work if needed.
    • Leveling, startup and operating check.
    • Manufacturer and installer warranty terms.

    If a gas dryer is involved, confirm who is qualified and permitted to disconnect and reconnect the gas supply. If an electric dryer needs a receptacle, circuit or panel correction, that is electrical work—not a hidden line item to discover after delivery.

    Worked Example: Compare Complete Totals

    Assume a technician diagnoses a no-heat electric dryer. The following numbers are an illustrative quote comparison, not national averages:

    Repair pathIllustrative amount
    Diagnostic visit$100
    Part$120
    Repair labor$170
    Diagnostic credit−$100
    Repair total$290
    Replacement pathIllustrative amount
    Comparable dryer$900
    Delivery and installation$150
    Cord or vent connection items$50
    Haul-away$50
    Replacement total$1,150

    The calculation is $100 + $120 + $170 − $100 = $290 for repair and $900 + $150 + $50 + $50 = $1,150 for replacement. The immediate difference is $860. If the $290 repair fails outside warranty and replacement follows, the combined spend becomes $1,440—$290 more than replacing first. That risk is why diagnosis, remaining condition, parts support and warranty matter alongside the price ratio.

    A Better Repair-or-Replace Test

    1. Verify the failure. Separate appliance trouble from a vent, outlet, breaker, gas-supply or usage problem.
    2. Normalize both totals. Include diagnosis, labor and tax in repair; include delivery, connections and disposal in replacement.
    3. Check the rest of the dryer. Drum condition, rust, control reliability, unusual noise and recurring repairs change the decision.
    4. Check parts support and warranty. A delayed or unsupported part creates downtime even if its list price is low.
    5. Price the next failure. A cheap repair is less attractive when another major system is already failing.
    6. Use a ratio as a prompt, not a rule. A repair near half the complete replacement cost deserves closer review, but safety, reliability, fit and downtime can override a simple percentage.

    When Repair Usually Makes More Sense

    • The diagnosis identifies one accessible, replaceable part.
    • The dryer otherwise runs smoothly and the drum and cabinet are sound.
    • The part is available promptly and carries a useful warranty.
    • The complete repair total is comfortably below a comparable installed replacement.
    • The current dryer fits a tight space or matched set that would be costly to replace.
    • The vent and utility connections are already safe and functional.

    When Replacement Deserves Priority

    • There is severe drum, cabinet, wiring or gas-system damage.
    • Sparks, smoke, melting, scorching or recurring overheating has been found.
    • Required parts are unavailable or the proposed repair has little warranty.
    • Multiple major parts are failing or recent repairs keep accumulating.
    • The complete repair total is close to a suitable installed replacement.
    • The unit cannot be installed or operated safely in the current space.

    Safety Boundary

    Stop using a dryer that smokes, sparks, smells like burning insulation, shows melted wiring, leaks gas, repeatedly trips protection or becomes abnormally hot. Unplug an electric dryer only if it is safe to reach the plug. Leave gas disconnection, internal energized testing and wiring repair to qualified professionals. Never bypass a thermal fuse or another safety device.

    Clean the lint screen before or after every load and keep the area around the dryer clear. Have the vent route inspected and serviced when airflow is poor or drying time increases. CPSC recommends periodic vent and exhaust-duct cleaning and advises replacing plastic or foil accordion duct with rigid or corrugated semi-rigid metal duct.

    FAQ

    Is a dryer worth repairing?

    Often, yes—when the failure is confirmed, the rest of the machine is sound, parts are available and the complete repair total is well below a comparable installed replacement. Age alone does not answer the question.

    How much does dryer repair cost in 2026?

    HomeAdvisor’s June 2026 guide reports a typical professional repair range of $100–$430 and an average around $180. Your total depends on the failure, local labor, access, part and whether the service fee is credited.

    Does a long dry time mean the dryer is failing?

    Not necessarily. A clogged or damaged exhaust path can reduce airflow and increase heat. Check the full vent route before buying an appliance to solve an airflow problem.

    Should I use the 50% rule?

    Use it only as a reason to examine the decision more closely. Compare complete totals, verified failure, remaining condition, warranty, parts support, downtime and safety. It is not a universal cutoff.

    Sources and Scope

    Sources checked October 24, 2026 (Eastern time): HomeAdvisor’s June 2026 dryer-repair cost guide; Homewyse’s May 2026 electric-dryer replacement planning model; and the U.S. Consumer Product Safety Commission’s overheated clothes dryer safety alert. Homestria did not inspect your dryer, test a circuit, disconnect gas or obtain a local quote. Price figures are planning references; the written local diagnosis and scope control the decision.
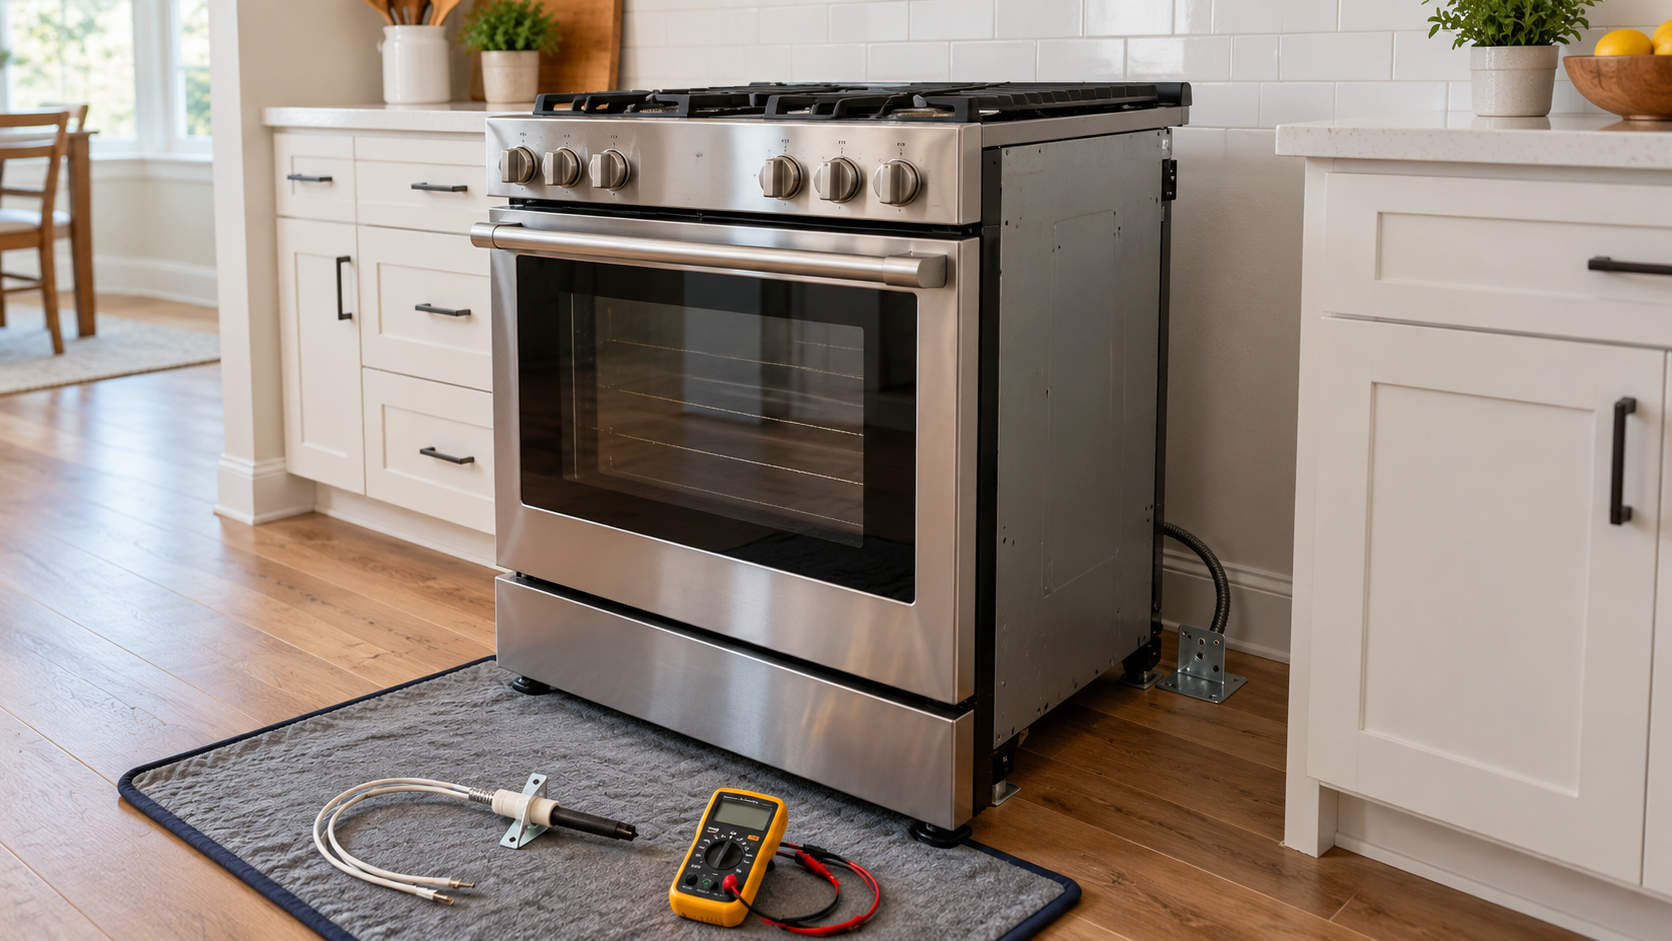
  • Oven Repair vs. Replacement Cost in 2026: Diagnose the Failed Part First

    Oven Repair vs. Replacement Cost in 2026: Diagnose the Failed Part First

    Quick answer: Repair is usually the better first price check when a technician can isolate the fault to an igniter, heating element, thermostat, door component, or other available part. Price replacement at the same time when the control system is unavailable, the cooking surface or cavity is structurally damaged, there is repeated gas or electrical trouble, or the complete repair approaches the complete installed replacement cost. Compare the same scope: diagnosis, part, labor, tax, delivery, hookup work, anti-tip hardware, permits if applicable, and haul-away.

    An oven that will not heat does not automatically need a new range. It also does not automatically need an igniter. The useful decision starts with the failed circuit or component, then compares that repair with a replacement quote that includes everything required to cook safely again.

    2026 planning ranges: repair the failed part, not the symptom

    ScopePublished 2026 planning figureWhat to confirm
    Electric oven repair$100–$250Part, wiring diagnosis, labor, and whether the service fee is separate
    Gas oven repair$100–$600Ignition diagnosis, gas-safety work, part, labor, and leak check
    Control-board problem$150–$300Whether the board is tested, repaired, replaced, programmed, or special-order
    Igniter replacementAbout $200Model-specific part, labor, and whether the safety valve was also tested
    Heating-element replacementAbout $275Bake or broil element, wiring condition, and labor
    Complete range replacement$1,284–$2,753 modeled rangeUnit, delivery, installation, hookup changes, anti-tip engagement, tax, and haul-away
    Repair figures are from HomeAdvisor’s June 17, 2026 update. The replacement figure is Homewyse’s May 2026 modeled national range, not a local quote. Actual prices vary by model, access, location, parts availability, and fuel type.

    Do not use one national number as a go/no-go rule. A freestanding electric range that plugs into an existing compatible circuit is a different replacement project from a slide-in gas range, a dual-fuel model, or a wall oven that requires cabinet changes. A repair quote is also incomplete if it names a part without explaining how the technician separated that part from the board, wiring, sensor, valve, or power supply.

    Start with the failure pattern

    What you observePossible branches to testWhy guessing is expensive
    Gas oven clicks or preheats slowlyIgniter, spark system, safety valve, gas supply, wiring, or control outputA new igniter will not correct every no-heat condition
    Electric oven is coldBake/broil element, relay, wiring, thermal protection, sensor, or supply voltageA visible element can look intact and still require electrical testing
    Temperature swings or runs high/lowSensor accuracy, calibration, control logic, element/igniter cycling, or door sealReplacing the board before checking the sensor can buy the wrong part
    Display is blank or erraticBreaker, terminal block, wiring, control board, user interface, or thermal fuseThe display symptom does not prove the main board is the only failure
    Door, glass, or cavity is damagedHinge, gasket, inner/outer glass, liner, and model-specific structural partsCosmetic, heat-containment, and structural damage have different safety implications

    Ask the technician to record the model number, symptom, test result, failed part number, and any unavailable or back-ordered part. “Not heating” is the symptom. “Igniter draws outside the manufacturer’s specification” or “the control is not supplying the required output after the load and wiring test correctly” is a diagnosis.

    Normalize the repair and replacement quotes

    • Diagnosis: service-call price, included test time, and whether the fee is credited if you authorize work.
    • Repair: exact part number, new/rebuilt status, labor, return visit, calibration, leak or electrical check, tax, and parts/labor warranty.
    • Replacement appliance: exact model, finish, width, depth, capacity, and whether it fits the existing opening.
    • Installation: delivery, stairs, leveling, compatible cord or gas connector, shutoff or receptacle work, anti-tip bracket installation and engagement, permit if required, and testing.
    • Removal: moving the old appliance, haul-away, recycling fee, and protection for floors and cabinets.
    • Exceptions: cabinet/countertop changes, gas-line or electrical-circuit work, code corrections, and concealed damage.

    For a freestanding range, the U.S. Consumer Product Safety Commission says the anti-tip hardware matters. If the range is moved for repair or replacement, the bracket must be present and the rear foot must be re-engaged according to the model’s instructions. Put that verification in the installation scope instead of assuming delivery includes it.

    Worked example: compare complete out-of-pocket cost

    Suppose a local written quote shows a $95 diagnostic visit, an $85 model-specific igniter, and $145 labor. The company credits the diagnostic fee when the repair is approved:

    1. Repair: $95 + $85 + $145 − $95 credit = $230.
    2. Replacement quote: $1,000 range + $250 delivery/installation + $50 haul-away + $85 connector and anti-tip scope = $1,385.
    3. Initial cash difference: $1,385 − $230 = $1,155.
    4. If the repair fails and the same replacement is needed later: $230 + $1,385 = $1,615, or $230 more than replacing now.

    These are illustrative quote inputs, not national averages. Change every line to your written prices. Then add two non-price questions: Is the diagnosed part available with a useful warranty, and does the appliance have another significant unresolved problem? A repair that restores normal operation for $230 may be compelling. A board that is unavailable, repeated heat damage, or a cracked cooking surface may change the decision even before the totals converge.

    When repair deserves the first quote

    • The failure is isolated and the correct part is available.
    • The cavity, cooktop, wiring, gas connection, and controls have no separate major defect.
    • The repair carries a clear parts-and-labor warranty.
    • The range fits the space and still meets the household’s needs.
    • The complete repair cost is comfortably below a complete like-for-like installed replacement.

    When replacement deserves a complete price

    • The required board, glass, liner, or structural part is unavailable or uncertain.
    • There is repeated electrical overheating, gas-control trouble, or more than one material failure.
    • The cooktop or oven cavity cannot safely contain heat, flame, or cookware.
    • The replacement solves a documented fit, capacity, accessibility, or fuel-source need that a repair cannot.
    • The repair approaches the installed replacement cost after all credits, taxes, and excluded work are included.

    Safety boundary

    If you smell or hear leaking gas, leave immediately, avoid lights, phones, switches, flames, and other electronics until you are outside, then contact the gas utility or emergency services. If a carbon-monoxide alarm sounds or anyone has possible CO symptoms, move outside to fresh air and call emergency services. Do not operate a suspected malfunctioning combustion appliance until trained personnel service it.

    For routine inspection, follow the exact owner’s and service information for the model. Disconnecting power does not make gas work safe, and turning a control off does not prove an electrical circuit is de-energized. Stop for burned wiring, a damaged cord or receptacle, shattered glass, an unengaged anti-tip bracket, a suspected gas leak, or any task that requires live-voltage or gas-valve testing beyond your training.

    Questions to ask before authorizing work

    1. What measurement or test identifies this part as the cause?
    2. Is the service fee included in the approved repair?
    3. Is the quoted part new, rebuilt, or repaired, and what warranty applies?
    4. If the appliance is moved, who reconnects it and verifies the anti-tip bracket?
    5. What conditions could add a second visit, cabinet work, gas work, or electrical work?
    6. What is the complete installed replacement total for a model that fits the same opening and hookups?

    Frequently asked questions

    Does a no-heat gas oven always need an igniter?

    No. The igniter is a common branch, but the circuit can also include the control, wiring, safety valve, supply, and model-specific protections. Ask for the test result instead of approving a part from the symptom alone.

    Should I use a “50% rule”?

    Use it only as a prompt to compare, not as a universal rule. Parts availability, installation changes, the appliance’s other faults, warranty, and how long you expect to keep the home can matter more than one percentage.

    Can a replacement quote exclude the anti-tip bracket?

    Do not assume it is included. Ask the installer to state that the correct bracket will be installed or reused as permitted, the rear foot will be engaged, and the result will be checked under the model’s instructions.

    Related reading

    Sources checked

    Checked October 23, 2026 (U.S. Eastern Time). Price pages are planning references, not offers. Safety and installation instructions for your exact model take priority.

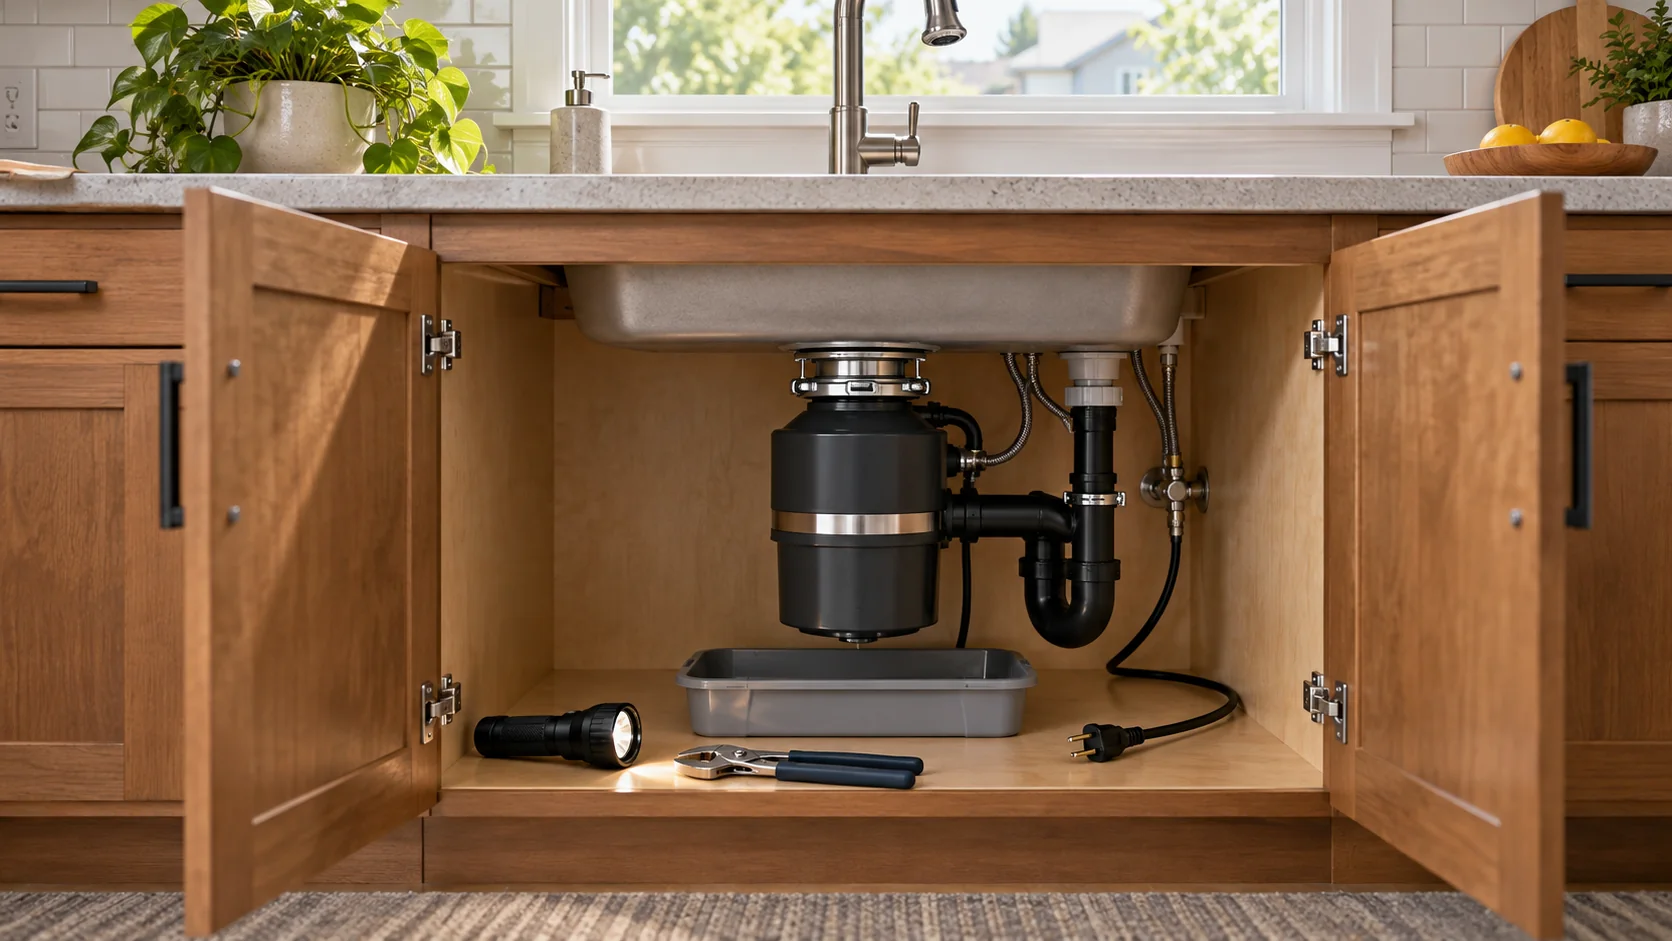
  • Garbage Disposal Repair vs. Replacement Cost in 2026: Compare the Complete Scope

    Garbage Disposal Repair vs. Replacement Cost in 2026: Compare the Complete Scope

    Quick answer: HomeAdvisor’s U.S. planning data, updated June 20, 2026, puts a typical garbage-disposal repair at $140–$310 and replacement at about $550. Repair usually makes sense for a reset problem, reachable jam, loose connection, worn gasket, flange leak, or drain-hose issue when the motor and housing are sound. Replacement usually makes more sense when the disposer body leaks, the motor has failed, the unit repeatedly jams or makes grinding noises, or a repair quote approaches a complete installed replacement with warranty.

    Those figures are planning benchmarks, not promises. The useful comparison is not “repair price versus appliance price.” It is one complete under-sink repair scope versus one complete installed replacement scope, including diagnosis, plumbing adjustments, electrical work, cleanup, disposal, and warranty.

    Repair or replace: start with the failure

    What you observeLikely first stepWhen replacement moves ahead
    Unit is silentCheck the wall switch, breaker, GFCI, plug, and reset button after power is safely isolatedConfirmed failed motor, damaged wiring, or a repair near installed replacement cost
    Hum with no grinding actionTurn power off and have the jam or motor condition diagnosedSeized or burned-out motor, or repeated jams after proper use
    Leak at sink flange, dishwasher hose, or drain connectionRepair the specific seal or connection if the disposer housing is soundCrack, corrosion, or leak from the disposer body or internal seal
    Slow drainingSeparate a disposer problem from a trap or branch-drain clogOnly after diagnosis shows the disposer itself is the failure
    New grinding, rattling, or repeated trippingStop use and inspect for a foreign object or internal damageDamaged grinding components, electrical fault, or recurring failure

    A symptom points to a test; it does not identify a part by itself. A sink that drains slowly may have a trap or branch-line clog. A leak may come from the flange, dishwasher inlet, drain elbow, or disposer housing. Ask the contractor to show the source before approving work.

    2026 planning ranges and what they exclude

    ItemPlanning figureImportant exclusions
    Typical repair$140–$310Local labor, tax, access, unrelated drain work, electrical repair, and after-hours charges can change the total
    Typical replacementAbout $550Disposer model, wiring method, plumbing changes, dishwasher connection, removal, and permit rules can change the total
    Plumber labor$50–$120 per hourA service or trip fee may be separate; ask whether it is credited to approved work
    Jam$0–$100Only when the jam is safely reachable and no internal damage is found
    Clog$150–$200Confirm whether the clog is in the disposer, trap, or branch drain
    National planning data from HomeAdvisor, updated June 20, 2026. These are not local quotes or guaranteed prices.

    Normalize the repair quote

    • Diagnostic or trip fee: amount, minimum time, and whether it is credited if you approve the repair.
    • Exact leak or failure: flange, gasket, drain elbow, dishwasher hose, power connection, jam, grinding component, motor, or disposer body.
    • Parts and labor: itemized separately, with part source and model compatibility.
    • Drain work: whether trap removal, branch-line clearing, or pipe replacement is included.
    • Electrical scope: plug-in cord, hardwiring, switch, GFCI, junction box, or electrician work.
    • Cleanup and return visit: cabinet drying, leak check, disposal of debris, and any callback charge.
    • Warranty: part coverage, labor coverage, term, and exclusions.

    Normalize the replacement quote

    • Exact disposer: brand, model, horsepower, feed type, power cord, and manufacturer warranty.
    • Mounting parts: sink flange, mounting ring, putty or gasket, and whether the existing assembly will be reused.
    • Plumbing: drain elbow, trap or branch adjustment, extension pieces, and leak testing.
    • Dishwasher connection: hose routing, clamp, air-gap or high-loop check where applicable, and inlet knockout removal.
    • Electrical connection: plug-in or hardwired scope, cord, strain relief, junction-box work, and whether an electrician is required.
    • Removal: old-unit haul-away, cleanup, and any disposal fee.
    • Protection: labor warranty and responsibility for a leak discovered after installation.

    Worked quote comparison

    Suppose a contractor documents a flange leak and offers these two choices. The numbers below are an illustration, not a market average.

    Repair optionReplacement option
    Diagnosis/service: $80New disposer: $220
    Flange and seal materials: $45Installation labor: $220
    Labor and leak test: $135Flange and cord: $45
    —Trap/dishwasher-line adjustment: $75
    —Removal and cleanup: $50
    Total: $260Total: $610

    The repair saves $350 initially. That can be sensible when the contractor confirms an external flange leak and the motor and housing are sound. But if the leak actually comes from the disposer body and replacement is still needed, paying $260 and then $610 produces an $870 total—$260 more than choosing the complete replacement first. The decision turns on the documented failure, not age alone.

    Safety: isolate power before looking

    Never put your hand or fingers into a garbage disposer. The InSinkErator owner’s manual instructs users to turn power off before attempting to clear a jam or remove an object. If you cannot positively isolate the correct breaker or unplug the unit, stop. Use only the manufacturer-approved wrench or tool for that model and follow its manual. Call a professional for damaged wiring, a burning smell, smoke, repeated breaker trips, an active leak near electrical parts, or any situation you cannot identify safely.

    DIY limits

    A homeowner can document where water first appears, check whether the unit is plugged in, and read the model-specific reset and jam-clearing instructions after power is isolated. Replacing a hardwired unit, altering drain piping, diagnosing internal motor faults, or working around a wet electrical connection belongs with a qualified professional unless you have the required skill and local authorization.

    Related decisions

    If the sink problem appeared during another appliance failure, compare the scope with Homestria’s dishwasher repair versus replacement guide. For a leaking supply or drain connection elsewhere, use the plumbing quote-normalization checklist. If you are deciding how to fund several small appliance failures, see the home warranty versus repair fund comparison.

    Frequently asked questions

    Is a leaking garbage disposal always replaced?

    No. A flange, hose, gasket, or drain connection may be repairable. A crack, corrosion, or leak from the disposer body or internal seal usually shifts the decision toward replacement. Ask the contractor to identify the exact source.

    Should I compare horsepower when replacing it?

    Yes, but horsepower is only one line item. Also compare physical fit, mounting system, electrical connection, noise features, warranty, plumbing changes, and the household’s actual use. A more powerful unit that requires extra under-sink work may not be the lower installed cost.

    Can a plumber and an electrician both be needed?

    Possibly. A plumber can address the disposer and drain connections, while damaged wiring, a missing compliant receptacle, switch work, or other electrical changes may require an electrician under local rules. The quote should identify who handles each scope.

    Does an older disposer have to be replaced?

    No. Age is context, not a diagnosis. A low-cost external seal repair can still be reasonable on an older unit if the housing and motor are sound. Repeated failures, body leakage, motor damage, unavailable parts, and a small gap between repair and replacement are stronger reasons to replace.

    Sources checked October 22, 2026

  • Refrigerator Repair vs. Replacement Cost in 2026: Compare the Complete Decision

    Refrigerator Repair vs. Replacement Cost in 2026: Compare the Complete Decision

    Quick answer

    Compare the remaining repair bill with the complete installed replacement cost—not the appliance sticker price. Add diagnosis, parts, labor, warranty limits, food protection, and the old refrigerator’s expected electricity cost to the repair side. Add delivery, fit changes, water-line work, haul-away, tax, and the new model’s operating cost to the replacement side. A sealed-system diagnosis, repeated failures, unavailable parts, or a cabinet that no longer seals can move the decision toward replacement; a confirmed fan, sensor, valve, gasket, or defrost repair on an otherwise sound refrigerator often favors repair.

    A warm refrigerator creates two decisions at once: how to protect the food now and whether to repair the appliance. Treat food safety as the first decision and cost as the second. This guide gives you a same-scope worksheet; it does not replace a model-specific diagnosis.

    Protect the food before comparing prices

    • Keep the refrigerator door closed while you confirm the temperature and arrange backup cooling.
    • Use an appliance thermometer. Refrigerated food should be kept at 40°F or below.
    • FoodSafety.gov says a closed refrigerator can keep food safe for up to four hours during a power outage. Perishable food exposed above 40°F for more than two hours should be discarded; do not taste food to judge safety.
    • Move food to a working refrigerator or a cooler with enough ice to stay at 40°F or below when repair timing is uncertain.

    These federal time-and-temperature rules address loss of power. A refrigerator that is running but not cooling may warm differently, so use the measured temperature and time—not the sound of the compressor—as your record.

    Put both options on the same cost ledger

    Cost lineRepair sideReplacement side
    DiagnosisService-call fee; note whether it is creditedAny second opinion needed before abandoning the unit
    Core workPart, labor, refrigerant handling, access, test runComparable refrigerator—not a smaller or lower-feature model
    Kitchen fitPanel, trim, built-in access, floor protectionDoor swing, depth, ventilation clearance, entry path
    Water connectionValve or line repair if part of the failureNew approved line, shutoff condition, leak test
    LogisticsReturn visit and temporary coolingDelivery, stairs, door removal, leveling, haul-away
    Food exposureCooler/ice and food discarded during repair delayFood protection during delivery and setup
    Operating costCurrent unit’s measured or label-based annual costNew model’s EnergyGuide annual cost
    Risk and coverageRepair warranty plus allowance for another likely failureProduct/labor warranty and return or damage process

    Ask the technician to name the failed system

    “Not cooling” is a symptom, not a diagnosis. Ask for the measured evidence and the part or system that failed. A quote should say whether it covers a fan, sensor, control, defrost component, gasket, water valve, ice maker, compressor, or refrigerant leak. For a sealed-system job, ask whether the leak was located, what refrigerant work is included, whether the compressor part warranty also covers labor, and what post-repair temperature test closes the job.

    EPA Section 608 rules require certified technicians for work that could release refrigerant. Refrigerant must also be properly recovered before disposal. Do not cut, vent, or open refrigerant tubing yourself.

    Normalize the two quotes before using a percentage rule

    QuestionRepair quoteReplacement quote
    Is the diagnostic fee included or credited?Write the answerNot applicable unless a second opinion is ordered
    Are parts and labor both included?List exclusionsList installation labor and exclusions
    What happens on a return visit?Warranty length and trip chargeDelivery damage/return process
    Is water-line work included?Repair and leak testNew line, valve condition, leak test
    Who removes the old appliance?Usually not applicableHaul-away and refrigerant recovery
    When will safe cooling be restored?Part availability plus repair dateIn-stock delivery and setup date

    A “repair if it is under 50%” rule can be a quick screen, but it is not a complete decision. The denominator must be the delivered, installed cost of a truly comparable refrigerator. The numerator should include the repair’s uncovered costs and the operating-cost difference over the period you expect to keep the appliance.

    Worked example: a five-year decision

    This is an illustration, not a national price estimate. Replace every input with your written quotes, EnergyGuide labels, electricity rate, and expected ownership period.

    Repair scenarioAmountReplacement scenarioAmount
    Diagnosed repair, including credited service call$620Comparable refrigerator$1,250
    Food protection during delay$85Delivery and placement$90
    Five-year extra electricity vs. new label ($42 × 5)$210Water-line/fit allowance$110
    Follow-on repair reserve$200Haul-away$50
    Five-year comparison total$1,115Installed total before tax$1,500

    In this example, repair is $385 lower before tax. But one additional $700 failure would make the repair path $315 higher. The useful question is not “How old is it?” by itself; it is “What will each path cost from today through the same end date, and which risks are still uncovered?”

    Use the EnergyGuide label, not a generic savings claim

    ENERGY STAR provides a refrigerator savings calculator and model finder. For a fair comparison, use your current unit’s measured kWh if available or a credible label/manual estimate, then compare it with the exact new model’s EnergyGuide annual operating cost. Multiply the annual difference by the years you expect to keep the appliance. Do not assume energy savings alone repay a replacement without doing that model-specific calculation.

    Repair, replace, or pause for a second opinion?

    SignalBest next step
    Confirmed replaceable component; cabinet and seals are sound; part is availablePrice the repair and its warranty
    Sealed-system diagnosis without leak location or test resultsGet a written diagnosis or second opinion
    Compressor part warranty exists but labor/refrigerant coverage is unclearGet the manufacturer’s written coverage split
    Repeated cooling failures, unavailable parts, damaged liner, or doors that will not sealBuild a complete replacement quote
    Built-in or panel-ready refrigeratorCompare repair with a like-for-like replacement and cabinet work
    Electrical burning smell, arcing, damaged cord, or recurring breaker tripUnplug only if safe and call a qualified professional; do not keep testing it

    Refrigerator decision checklist

    • Photograph the model/serial label and current temperature.
    • Record when cooling was lost and when food exceeded 40°F, if known.
    • Ask for the failed component, test result, part number, and repair warranty in writing.
    • Separate part coverage from labor, refrigerant, trip, and food-loss coverage.
    • Price a comparable replacement with delivery, fit, water line, leveling, tax, and haul-away.
    • Compare energy over the same years using the exact new model’s EnergyGuide data.
    • Confirm the entry path, door swing, depth, ventilation clearances, and shutoff valve before delivery.
    • Keep the old refrigerator until the new unit is inspected and reaches a safe temperature, unless the delivery terms require immediate removal.

    Frequently asked questions

    Should I replace a refrigerator just because it is 10 years old?

    No. Age changes the risk of future failures and parts availability, but it does not identify today’s fault. Compare a confirmed repair with a complete replacement cost and the exact model’s energy use.

    Does a compressor warranty make the repair free?

    Not necessarily. A warranty may cover only the part. Ask about diagnosis, labor, refrigerant, access, shipping, return visits, and whether prior authorization is required.

    Can I recharge a refrigerator myself?

    Do not open or vent the refrigerant circuit. A low charge also indicates that refrigerant escaped; adding refrigerant without locating and addressing the problem is not a complete diagnosis. EPA certification rules apply to service that could release refrigerant.

    Related reading

    Sources

    Sources checked October 21, 2026. Prices in the worked example are hypothetical worksheet inputs, not market averages or quotes.

  • Washing Machine Repair vs. Replacement Cost in 2026: Compare the Complete Scope

    Washing Machine Repair vs. Replacement Cost in 2026: Compare the Complete Scope

    Quick Answer: Repair is usually the stronger choice when a technician identifies one replaceable part and confirms that the tub, drum, wiring, hoses, drain path, and floor below are sound. Get a complete replacement quote when the tub or cabinet is damaged, the machine has multiple major faults, a part is unavailable, or the existing installation itself needs correction. Compare a complete repair total with a complete installed replacement total—not a repair estimate with a washer’s shelf price.

    Stop and check safety first

    Record the brand, model number, and serial number, then check the U.S. Consumer Product Safety Commission recall database and the manufacturer’s instructions. A model-specific recall remedy can change the decision.

    • Stop the cycle if the washer moves violently, the top or cabinet separates, or the drum appears loose.
    • Shut off the water supply if a hose, valve, tub, or drain path is leaking. Disconnect power only when it is safe to do so.
    • Stop using the machine if you smell burning, see smoke or scorched wiring, or the breaker trips. Do not keep resetting a breaker.
    • Do not reach into a moving tub or bypass a lid or door lock.

    CPSC has issued model-specific washer recalls for hazards including excessive vibration and top detachment. That does not mean every vibration complaint is recalled; it means the model and serial number belong in the diagnosis.

    Translate the symptom into a test

    Symptom Evidence to request Possible scope—not a diagnosis
    Water on the floor Run the machine and identify the exact source; inspect hoses, pump, door boot, valves, tub, and drain Connection, hose, pump, seal, boot, valve, tub, or building drain
    Will not drain Filter and drain-path inspection; pump electrical and mechanical test; hose routing Obstruction, pump, hose, control, or standpipe problem
    Won’t spin or shakes Load check, leveling, shipping-bolt check, suspension and bearing inspection Installation, suspension, drive, bearing, drum, or control issue
    No fill or slow fill Supply-valve and pressure check; screen, hose, inlet valve, and sensor tests Household supply, hose, valve, pressure sensor, or control
    No power or stops Outlet/circuit, cord, lid or door lock, control input, and stored-code checks Branch circuit, interlock, wiring, control, or motor protection
    Noise Locate the sound by cycle and load; inspect trapped objects, pump, drive, bearing, and drum Foreign object, pump, belt, pulley, motor, bearing, or structural damage

    An error code can point to a service-manual test path, but it does not always prove which part failed. Ask the technician to state the test result and why the proposed repair is expected to solve the symptom.

    Repair and replacement quotes cover different work

    Cost item Repair path Replacement path
    Diagnosis Service call, testing, and disassembly allowance Usually absent from the retail appliance price
    Core work Named part, labor, return visit, reassembly, and test cycle Washer, delivery, placement, hookup, leveling, and test cycle
    Connections Existing hoses and valves may be reused unless listed New fill hoses, drain hose or extension, shutoff work, and cord may be separate
    Fit and access Usually no relocation Stairs, tight doors, stacking kit, pedestal, closet clearance, or floor correction may cost extra
    Removal Old parts only Disconnect, haul-away, and disposal may be separate
    Water damage Drying and floor, wall, or ceiling repairs are separate Still separate unless specifically included
    Warranty Part and labor terms for the repair Manufacturer warranty plus installation-work warranty

    Normalize both written quotes

    1. Machine: exact existing model and proposed replacement model.
    2. Diagnosis: failed component, test result, fault code, and unresolved possibilities.
    3. Repair: part number and grade, labor, shipping, tax, second visit, and final test.
    4. Replacement: appliance, delivery, installation, stacking or pedestal work, and removal.
    5. Water connections: hot/cold hoses, shutoffs, drain hose, standpipe fit, drain pan, and leak test.
    6. Fit: opening, door swing, floor level, ventilation, stairs, and finish protection.
    7. Damage outside the washer: inspection, drying, and repair responsibility.
    8. Closeout: shipping-bolt removal, leveling, empty test cycle, fill/drain check, and cleanup.
    9. Warranty: separate parts, labor, appliance, and installation terms.

    Ask whether the diagnostic fee is credited if you approve the repair. For concealed damage or extra installation work, set an approval threshold: no added work over a stated amount without photos, a written price, and your authorization.

    Worked example: compare complete totals

    These numbers demonstrate the method; they are not national prices or local quotes. Replace every amount with written quotes for your home.

    Repair path Example Replacement path Example
    Credited diagnosis balance $40 Comparable washer $780
    Drain pump $180 Delivery and basic hookup $160
    Labor and test cycle $210 New hoses and drain pan $85
    Tax and shipping $35 Stair/stacking allowance $175
    Return visit Included Haul-away and tax $120
    Normalized total $465 Normalized total $1,320

    Repair share = $465 ÷ $1,320 = 35.2%. That ratio is a prompt for judgment, not an automatic rule. A supported repair with a useful warranty may be reasonable; replacement can be stronger even at a lower percentage when the tub leaks, the drum or bearing structure is damaged, several faults are present, or the required part is unavailable. Do not count the same hose, delivery, or tax line twice.

    Check operating cost using the exact labels

    The Federal Trade Commission says the yellow EnergyGuide label helps shoppers compare similar products using estimated annual energy use and operating cost. The dollar figure is based on a national energy price and typical use, so your bill can differ. ENERGY STAR says certified clothes washers use about 20% less energy and 30% less water than regular washers on average; that program-level comparison is not a promised household saving.

    Annual electricity difference = (existing annual kWh − replacement annual kWh) × your electricity rate.

    If the exact labels differ by 60 kWh per year and electricity costs $0.20 per kWh, the electricity difference is 60 × $0.20 = $12 per year. Water, sewer, cycle choice, load size, detergent, drying, and repair risk are separate. Use your bills and the exact model labels; do not buy a washer on a generic payback claim.

    Repair is usually stronger when

    • The failure is isolated and supported by a test.
    • The tub, drum, bearing structure, wiring, hoses, and floor are sound.
    • The needed part is available with a meaningful parts-and-labor warranty.
    • The machine has not had repeated major repairs.
    • The capacity, accessibility, and cycle performance still fit the household.

    Replacement deserves a full quote when

    • The tub, cabinet, drum support, or bearing structure has major damage.
    • A leak has affected flooring or the ceiling below and the complete risk is unresolved.
    • Multiple major failures are present or the same failure has returned.
    • The required part is discontinued or has an unacceptable arrival date.
    • The installation needs corrected hoses, shutoffs, drain routing, stacking, or floor support either way.
    • A recall or manufacturer instruction provides a replacement or other specific remedy.

    Installation closeout checklist

    • Confirm shipping bolts and packing materials are removed as the manual requires.
    • Level the washer and verify all feet are stable.
    • Use the specified fill hoses; open both supply valves and inspect every connection.
    • Route and secure the drain hose according to the exact manual and standpipe setup.
    • Run the specified empty test or quick cycle and watch fill, agitate, drain, and spin.
    • Check for leaks during the cycle and again after it ends.
    • Keep the model, serial, installation invoice, warranty, and shutoff location in the home record.

    Manufacturer instructions vary. Whirlpool’s published installation checklist, for example, includes removing shipping materials, leveling, connecting hoses, securing the drain hose, turning on water, and running an empty quick cycle. Use the instructions for the exact machine, not a generic checklist as a substitute.

    Related reading

    FAQ

    Does a washer repair quote include the diagnostic fee?

    Not automatically. Ask what is due if you decline the repair and how much, if any, is credited when you approve it.

    Should I replace the fill hoses with the washer?

    Follow the washer and hose manufacturers’ instructions and have the condition and compatibility checked. Make the hoses, valves, drain routing, and leak test explicit quote lines rather than assuming they are included.

    Does a more efficient washer automatically pay for itself?

    No. Compare exact EnergyGuide labels, your energy and water rates, and actual use. Then weigh those operating-cost differences against the installed price, supported repair, leak risk, reliability history, and household needs.

    Sources and scope

    Sources checked October 20, 2026: FTC EnergyGuide consumer guidance; ENERGY STAR clothes washer guidance; CPSC Samsung top-load washer recall; Whirlpool washing-machine installation checklist; and the CPSC recall database. Homestria did not inspect your washer, plumbing, electrical circuit, floor, or drain. The worked prices are illustrative, not market averages or contractor quotes.

  • Dishwasher Repair vs. Replacement Cost in 2026: Compare the Complete Scope

    Dishwasher Repair vs. Replacement Cost in 2026: Compare the Complete Scope

    Quick Answer: Repair usually makes sense when a technician identifies one replaceable part and the tub, wiring, water connections, cabinet floor, and surrounding countertop are sound. Replacement deserves a same-scope quote when the tub itself leaks, the repair is one of several recent failures, a needed part is unavailable, or the installed replacement solves a fit, safety, or performance problem the repair cannot. Compare the complete repair total with the complete installed replacement total—not a repair estimate with an appliance’s shelf price.

    First, rule out a recall or an unsafe condition

    Record the brand, model number, and serial number before paying for diagnosis. Search the U.S. Consumer Product Safety Commission recall database and the manufacturer’s service notices. A matching recall may provide a specific remedy, such as a free repair, and its instructions override a generic repair-or-replace rule.

    • Stop using the dishwasher if you see smoke, melted wiring, scorch marks, or a damaged power cord, or if you smell burning.
    • If water is reaching wiring, the floor below, or a ceiling, stop the cycle, shut off the appliance’s water supply, and disconnect power at the breaker only if you can do so safely.
    • Do not repeatedly reset a tripping breaker. Have the appliance and branch circuit evaluated.
    • Follow any recall or manufacturer instruction about whether to unplug the unit or switch off its breaker.

    CPSC dishwasher recalls have addressed overheating cords and electrical failures. That does not mean every hot connector or failed heater is recalled; it means the model and serial number belong in the diagnosis.

    Repair and replacement quotes are not the same scope

    Cost itemRepair pathReplacement path
    DiagnosisService call, testing, error-code verificationNot usually included in a retail appliance price
    Core workNamed part, labor, return visit, calibration or leak testNew appliance, delivery, installation and commissioning
    ConnectionsReuse unless the quote says otherwiseSupply line, drain hose, cord or hardwire kit, shutoff and air-gap/high-loop work may be separate
    Fit correctionsUsually noneCabinet opening, flooring, countertop bracket, electrical box or plumbing changes may be extra
    RemovalOld parts onlyOld appliance pull-out, haul-away and disposal may be separate
    Damage outside applianceCabinet or floor drying/repair is separateStill separate unless specifically included
    WarrantyPart and labor term for the repairManufacturer warranty plus installation-work warranty

    Ask whether the diagnostic fee is credited if you approve the repair. Also ask what you owe if the technician orders a part and a second failure is found after disassembly.

    Translate the symptom into a test

    SymptomEvidence to requestPossible scope—not a diagnosis
    Standing waterFilter and drain-path inspection; drain-pump test; hose routingClog, hose, pump, check valve or disposal connection
    Does not fillSupply shutoff and pressure check; inlet-valve and float testPlumbing supply, valve, float or control problem
    Leaks during a cycleIdentify the exact source while runningDoor seal, hose, pump housing, connection or damaged tub
    No heat or poor dryingHeater, sensor, relay and control test; verify selected cycleHeating circuit, sensor, control or use issue
    No power or intermittent powerOutlet/connection, breaker, door switch and control input testBranch-circuit issue, latch, cord, junction or control board
    Poor cleaningSpray-arm flow, filter, water temperature, detergent and loading checkMaintenance, pump, heater or water-supply issue

    An error code narrows the service manual’s test path; it does not always name the failed part. A quote should state what was tested and why the proposed part is expected to solve the symptom.

    Normalize the written quotes

    1. Model: exact existing and proposed replacement model numbers.
    2. Diagnosis: failed component, test result, fault code and whether another failure could produce the same symptom.
    3. Repair: OEM or aftermarket part, labor, shipping, tax, return visit and old-part disposition.
    4. Replacement: appliance, delivery, basic installation, removal and haul-away.
    5. Connections: supply line, shutoff, drain hose, air gap/high loop, cord, plug, junction box or hardwire kit.
    6. Fit: opening dimensions, leveling, mounting, floor height and cabinet or countertop correction.
    7. Water damage: who inspects, dries and repairs the cabinet base, subfloor or ceiling below.
    8. Closeout: fill, drain, heat, leak and door-latch tests plus cleanup.
    9. Warranty: separate parts, labor and installation terms.

    If concealed damage is possible, set an approval threshold: no extra plumbing, wiring, cabinet or floor work above a stated amount without photos, a price and your authorization.

    Worked example: compare complete totals

    This example is arithmetic, not a national price estimate. Replace every amount with written local quotes.

    Repair pathExampleReplacement pathExample
    Diagnosis after credited portion$40Comparable dishwasher$700
    Control module$310Delivery and installation$220
    Labor and final test$190Connection kit$55
    Tax and shipping$35Electrical/cabinet allowance$175
    Return visitIncludedRemoval, haul-away and tax$110
    Normalized total$575Normalized total$1,260

    Repair share = $575 ÷ $1,260 = 45.6%. That ratio is a prompt for judgment, not an automatic rule. A well-diagnosed repair with a useful warranty can still be sensible. Replacement may be stronger at a lower percentage if the tub leaks, parts are unavailable, the same fault has returned, or the existing installation needs correction. Do not add an allowance twice if a quote already includes that work.

    Check operating cost without promising a payback

    The Federal Trade Commission says a dishwasher’s yellow EnergyGuide label shows estimated yearly energy use and operating cost so shoppers can compare similar models. The dollar figure uses typical use and a national energy price; your bill can differ. ENERGY STAR’s current criteria, effective July 19, 2023, limit a standard-size certified dishwasher to 240 kWh per year and 3.2 gallons per cycle, and a compact model to 155 kWh per year and 2.0 gallons per cycle under the applicable test procedure.

    Use the labels for the exact models:

    Estimated annual electricity difference = (existing labeled kWh − replacement labeled kWh) × your electricity rate.

    For illustration, a 67 kWh annual difference at $0.20 per kWh equals $13.40 per year. That example does not include water, detergent, cycle choice or repair risk, and it is not a payback promise. Use your utility rates and actual operating pattern.

    Repair is usually stronger when

    • The failure is isolated and supported by a test.
    • The tub, frame, wiring, hoses and cabinet floor are sound.
    • The part is available with a meaningful parts-and-labor warranty.
    • The appliance has not required repeated major repairs.
    • The repaired unit still fits the household’s capacity and cycle needs.

    Replacement deserves a full quote when

    • The tub or structural part is cracked or leaking.
    • A second major failure is present or the same fault returned.
    • The needed part is discontinued or has an uncertain arrival date.
    • The installation has damaged wiring, plumbing or mounting that must be corrected either way.
    • The current unit no longer meets capacity, accessibility or noise needs.
    • A model-specific recall remedy or manufacturer instruction makes replacement the appropriate path.

    DIY boundary

    Cleaning an accessible filter or checking the owner’s manual is different from opening a live electrical enclosure or pulling a hardwired, water-connected appliance. Stop when the breaker trips, wiring is damaged, a burning odor appears, water reaches electrical parts, the shutoff does not close, the cabinet floor is soft, or the repair requires procedures reserved by the manufacturer for qualified service technicians. Follow the manual and local rules; hire qualified appliance, plumbing or electrical help for the actual scope.

    Decision record

    • Existing model and serial number:
    • Recall check result and date:
    • Symptom and test result:
    • Complete repair total and warranty:
    • Complete installed replacement total and model:
    • Excluded connection, fit and damage work:
    • Repair share of normalized replacement total:
    • Chosen path and reason:

    Related reading

    FAQ

    Does a dishwasher repair quote include the diagnostic fee?

    Sometimes. Ask what is due if you decline the repair and how much, if any, is credited when you approve it.

    Does basic replacement include a new supply line and haul-away?

    Not automatically. Require delivery, connection parts, removal, disposal, fit corrections and final testing to be listed.

    Should energy savings decide the replacement?

    Usually not by themselves. Compare the exact EnergyGuide labels and your utility rate, then weigh the verified repair, water risk, fit, reliability history and installed replacement cost.

    Sources and scope

    Sources checked October 19, 2026: ENERGY STAR dishwasher key product criteria, ENERGY STAR dishwasher shopping guidance, FTC EnergyGuide consumer guidance, CPSC search, and the CPSC ASKO dishwasher recall as an example of a model-specific remedy. Homestria did not inspect your dishwasher, cabinet, wiring or plumbing. The worked numbers are illustrative and are not market averages or contractor quotes.

  • Toilet Repair vs. Replacement Cost in 2026: Normalize the Plumbing Quote

    Toilet Repair vs. Replacement Cost in 2026: Normalize the Plumbing Quote

    Quick Answer: Repair is usually the better buy when the problem is limited to a flapper, fill valve, handle, supply line, or wax seal and the porcelain, flange, floor, and shutoff valve are sound. Replacement deserves a same-scope quote when the bowl or tank is cracked, the fixture rocks because its support is damaged, repairs keep recurring, or an older high-use toilet would materially reduce water use. Current national planning guides put professional toilet repair at $150–$391 and standard installation at $224–$533. Those numbers are not directly comparable until both quotes state the fixture, removal, wax seal, supply line, shutoff, flange, floor work, haul-away, and warranty.

    Toilet repair vs. replacement cost at a glance

    OptionCurrent national guideUsually coversVerify separately
    Professional repair$150–$391; average $271Diagnosis and a defined tank, seal, valve, clog, or connection repairTrip/diagnostic fee, pulling and resetting the bowl, flange or floor work, emergency premium
    Standard installation$224–$533; average $374Labor to remove/set a toilet under normal conditionsFixture price, $50–$200 removal/haul-away, shutoff, supply line, flange, drain adjustment, floor repair

    HomeAdvisor updated both national guides on June 19, 2026. Its installation range is a planning benchmark, not proof that a quoted toilet, removal, or concealed repair is included. Angi’s July 20, 2026 repair guide is a useful component cross-check: it lists valve work at $50–$150, wax-ring work at $50–$200, and flange work at $145–$350. Your local price can fall outside these ranges.

    Start with the symptom, not the fixture price

    SymptomEvidence to requestLikely scope—not a diagnosis
    Water silently enters the bowlDye test, flapper/flush-valve inspection, tank water levelTank repair is often enough
    Tank fills slowly or keeps runningFill-valve operation, float setting, supply flowFill valve or supply issue
    Water appears at the base only after flushingDry-floor flush test; inspect wax seal and flange after removalPull/reset, wax seal, or flange repair
    Toilet rocksFloor level, bolt/flange condition, soft-floor checkDo not solve movement with caulk alone; repair support first
    Visible porcelain crackPhoto and dry inspection of tank and bowlReplace the cracked component or fixture; do not rely on patching
    Repeated clogsConfirm trapway blockage versus branch-drain problemFixture replacement will not fix a downstream drain obstruction

    A toilet can have two problems at once. A worn flapper can waste water while a failed wax seal damages the floor. Conversely, a base leak does not prove the porcelain needs replacement. Ask the plumber to identify the failed component and what changed after the repair test.

    Normalize the two quotes

    • Fixture: owner-supplied or contractor-supplied, model number, bowl height, rough-in, seat, finish, and delivery.
    • Removal: draining, disconnecting, lifting, protecting the room, and haul-away.
    • Connections: new wax or approved seal, closet bolts, supply line, and whether the shutoff valve is reused.
    • Flange: inspection after lifting, minor repair versus full replacement, and a written unit price.
    • Floor: leveling, soft subfloor, tile or finish repair, and who restores surfaces outside the toilet footprint.
    • Drain: clearing or camera work only when justified, not silently bundled into a fixture quote.
    • Closeout: leak test, repeated flush test, stable setting, cleanup, and labor/parts warranty.
    • Fees: diagnostic or trip charge, after-hours premium, permit if applicable, tax, and disposal.

    The biggest quote change often appears only after the old bowl is lifted. Require an approval threshold: no flange, floor, or drain work above the stated allowance without photos, a price, and your authorization.

    Worked example: compare the same finished result

    This is an illustrative worksheet, not a market average. Replace every number with your written bids.

    Repair pathExampleReplacement pathExample
    Pull/reset with new seal$240Base installation, new seal, and final test$390
    New supply line$35New fixture$280
    Minor flange allowance$125Removal/haul-away$90
    Leak and stability testIncludedSupply line and seat$60
    No additional item—Same minor flange allowance$125
    Normalized total$400Normalized total$945

    Repair share = $400 ÷ $945 = 42.3%. This example assumes the same minor flange work is needed on both paths and is not included in the base installation price. Both paths include a new seal and final leak and stability testing; no additional floor or drain work is assumed. The example totals are before tax. If a real quote already bundles flange work, do not add the allowance again. The percentage is a comparison aid, not an automatic replacement rule. If the toilet is otherwise sound and the flange repair is durable, repair may still have the better lifecycle cost. If the porcelain is cracked, the footprint hides damaged flooring, or the fixture has repeated performance problems, replacement may solve more of the actual scope.

    Add water use without inventing savings

    EPA WaterSense-labeled toilets use 1.28 gallons per flush or less. EPA’s calculator uses 5.0 gallons per flush for pre-1980 toilets, 3.5 for toilets installed from 1980 through 1994, and 1.6 after 1994 when estimating replacement savings. Those are calculator assumptions—not a measurement of your fixture.

    Use this home-specific formula:

    Annual water savings = (current gallons per flush − replacement gallons per flush) × household flushes per day × 365.

    Then multiply gallons by your combined local water and sewer rate. Use the toilet’s stamped/rated flush volume and your bill—not a national dollar promise. If a dye test shows a leaking flapper, repair that leak before treating replacement savings as the only option. EPA specifically identifies worn flappers as a common, inexpensive source of toilet leaks.

    Repair is usually stronger when

    • The tank hardware or seal is the only verified failure.
    • The porcelain has no crack and the bowl is stable.
    • The flange is sound or needs a limited, documented repair.
    • The floor is firm and dry after inspection.
    • The fixture performs acceptably after a leak, fill, and flush test.
    • The repair warranty covers the touched parts and labor.

    Replacement deserves a full quote when

    • The tank or bowl is cracked.
    • Repeated repairs have not fixed flushing or leaking.
    • The model needs unavailable or unusually expensive proprietary parts.
    • Accessibility, height, bowl shape, or household needs have changed.
    • An older high-use fixture creates meaningful, bill-based water savings.
    • The bathroom project already requires lifting the fixture and repairing the flange or floor.

    DIY boundary

    A flapper or simple tank part can be a reasonable DIY task if you can shut off water, follow the fixture instructions, and verify a leak-free result. Stop when the shutoff does not close, porcelain is cracked, the fixture rocks, the flange is broken or corroded, the floor is soft, sewage is present, or the leak reaches a ceiling below. Porcelain is heavy and can break sharply; moving and resetting a toilet safely often needs two people.

    Quote checklist

    1. What failed, and what test supports that diagnosis?
    2. Is the fixture supplied, and what exact model is priced?
    3. Are removal, haul-away, seal, bolts, supply line, seat, caulk, and cleanup included?
    4. What flange and floor conditions are excluded?
    5. What approval and price apply if concealed damage appears?
    6. Will the plumber perform and document leak, flush, and stability tests?
    7. What parts and labor warranties apply?

    Related reading

    FAQ

    Does a toilet installation quote include the new toilet?

    Not necessarily. Some quotes are labor-only; others include a named fixture. Require the model number, seat, delivery, removal, connection parts, and haul-away to be written down.

    Will replacing the toilet fix a base leak?

    Only if the leak is in the fixture or seal and the flange, drain, and floor are sound. A new toilet set on a broken flange or soft floor can leak and move again.

    Should I replace a running toilet?

    Diagnose it first. EPA notes that worn flappers are a common cause and can often be replaced inexpensively. Replacement becomes more compelling when the fixture also has cracks, repeated failures, poor performance, or a large verified water-use gap.

    Sources and scope

    Sources checked October 18, 2026: HomeAdvisor toilet repair, HomeAdvisor toilet installation, Angi toilet repair, EPA WaterSense residential toilets, and EPA WaterSense calculator methodology. Costs are national planning references, not a quote. Homestria did not inspect your bathroom or test your plumbing.

  • Gutter Repair vs. Replacement Cost in 2026: Compare the Same Roofline

    Gutter Repair vs. Replacement Cost in 2026: Compare the Same Roofline

    Quick Answer: Repair is usually the better fit when the failure is limited to a seam, outlet, short run, or a few hangers and the fascia behind it is sound. Full replacement is easier to justify when corrosion, poor slope, damage, or undersized drainage affects much of the roofline. Current national guides put professional gutter repair at $194–$643 and replacement at $629–$1,736, but those totals often describe different amounts of work. Compare the same measured footage, downspouts, access, removal, fascia assumptions, and warranty before deciding.

    Gutter repair vs. replacement cost at a glance

    OptionCurrent national guide rangeTypical scopeCommon exclusions to check
    Repair$194–$643; average $400Leaks, loose hangers, slope correction, a short damaged section, or a downspout repairFascia/soffit carpentry, lift or difficult access, paint, disposal, drainage redesign
    Replacement$629–$1,736; average $1,182New runs sized and measured for the house, usually with new hangers and selected downspoutsTear-off, disposal, fascia repair, drip-edge work, underground drainage, guards, permits

    The repair figures come from HomeAdvisor’s June 17, 2026 guide; the replacement figures come from its June 20, 2026 guide. Angi’s October 1, 2026 repair guide provides a useful cross-check: a $390 average and a typical $240–$480 range. These are planning benchmarks, not quotes for your home. Local labor, material, height, roof shape, and the amount of damaged wood can move a bid far outside them.

    First identify what actually failed

    What you seeEvidence to requestLikely scope—not a diagnosis
    Leak at one joint or end capDry-surface photo and water test after sealingLocal cleaning, resealing, or fitting replacement
    One sagging sectionHanger spacing, fastener condition, and a firm-fascia checkRehang/repitch if the wood is sound; carpentry first if it is soft
    Water behind the gutterPhotos of drip edge, apron, fascia, and the rear of the gutterMay be a flashing or fascia problem rather than a gutter-only repair
    Overflow during ordinary rainClean outlet, measured run, downspout count/size, and observed flowCleaning, slope correction, another outlet, or redesigned capacity
    Cracks, rust, or failed joints across several runsMarked roofline plan showing every affected areaMultiple repairs or replacement; compare both on the same plan

    A gutter that pulls away from the house may have a failed hanger, but it can also be attached to rotted fascia. Paying to fasten a sound gutter back into soft wood does not solve the underlying problem. Ask the contractor to separate gutter work from carpentry and provide a unit price for concealed damage found after removal.

    Normalize repair and replacement quotes

    • Measured footage: total system length and the exact length being repaired or replaced.
    • Profile and material: size, style, thickness where relevant, seamless or sectional, and finish.
    • Hangers: type, spacing, fastening surface, and whether old hardware remains.
    • Downspouts: count, size, outlets, elbows, extensions, and where water discharges.
    • Access: stories, roof pitch, landscaping, lift/scaffold charges, and power-line constraints.
    • Removal: tear-off, haul-away, cleanup, and temporary weather protection.
    • Hidden damage: fascia, soffit, subfascia, rafter-tail, or flashing work with unit prices and approval triggers.
    • Closeout: water-flow test, photos, workmanship warranty, and material warranty.

    Do not compare a $400 patch with a $1,200 system replacement until both bids cover the same roofline plan. One may exclude downspouts and rotten fascia while the other includes them.

    Worked example: calculate the repair share

    This scenario is a math example, not a national average. Assume one contractor prices a limited repair and a second prices a full 160-foot replacement:

    Repair quoteAmountReplacement quoteAmount
    Rehang/repitch 24 ft$264160 ft seamless gutter$1,920
    Two seam/end repairs$140Four downspouts$600
    Downspout correction$180Tear-off/disposal$240
    Access/mobilization$250Access included$0
    Same 8-ft fascia allowance$144Same 8-ft fascia allowance$144
    Total$978Total$2,904

    Repair share = $978 ÷ $2,904 = 33.7%. That percentage is useful only after scope is normalized. It does not create a universal “repair below X%” rule. A repair can still be poor value if the rest of the system is corroded, incorrectly sized, repeatedly leaking, or attached to failing wood. Replacement can still be unnecessary if one short, accessible run failed and the rest is sound.

    When repair is usually the stronger bid

    • The cause is localized and documented.
    • The surrounding gutter retains its shape and coating.
    • The fascia is sound where new fasteners will land.
    • The existing profile and finish can be matched well enough.
    • Slope and outlets can be corrected without rebuilding long runs.
    • The repair warranty clearly covers the touched section.

    When replacement deserves a same-scope quote

    • Rust, cracking, deformation, or failed joints appear in multiple runs.
    • Several repairs have shifted the problem rather than correcting drainage.
    • Major portions are poorly sloped or pull away from the fascia.
    • The current layout cannot handle the roof areas feeding each outlet.
    • Long seamless sections are damaged beyond a durable local repair.
    • Roof, fascia, or siding work already requires removing most of the system.

    DIY safety boundary

    Ground-level observation and photographing discharge after rain are lower-risk tasks. Roofline work is not. The U.S. Consumer Product Safety Commission advises stable ladder placement, a helper to stabilize the ladder, never standing on the top rung, and keeping ladders away from power lines. Multi-story work, steep roofs, wet surfaces, rotten attachment points, heavy continuous runs, and nearby electrical lines are reasons to use a qualified professional.

    Questions to ask before approval

    1. What evidence shows the gutter itself—not a roof, flashing, fascia, or drainage problem—is the cause?
    2. How many linear feet and downspouts does this price include?
    3. What happens if rotten fascia or subfascia appears after removal?
    4. Are tear-off, disposal, access equipment, cleanup, and water testing included?
    5. Will the repair match the existing profile and finish?
    6. What is covered by the workmanship warranty, and for how long?

    Related reading

    FAQ

    Is it cheaper to repair gutters?

    Usually for a localized failure, but not always over the remaining life of the system. Compare the repair’s exact footage and warranty with a replacement quote that uses the same material, downspouts, access, removal, and fascia assumptions.

    Does a gutter replacement quote include fascia repair?

    Do not assume it does. Ask for a stated allowance or unit price, the conditions that trigger it, and photo approval before concealed carpentry proceeds.

    Should gutters be replaced with the roof?

    Coordination can avoid duplicate removal and access, but a roof project does not automatically make a sound gutter system disposable. Ask the roofer and gutter contractor to state what must be removed, what can be protected and reinstalled, and who warranties the transition.

    Sources and scope

    Cost references checked October 17, 2026: HomeAdvisor gutter repair, HomeAdvisor gutter replacement, and Angi gutter repair. Safety guidance: U.S. CPSC outdoor repairs checklist. National ranges are planning references and exclude many site-specific conditions. Homestria did not inspect your house or obtain contractor bids.

  • Siding Repair vs. Replacement Cost in 2026: Patch the Damage or Re-side?

    Siding Repair vs. Replacement Cost in 2026: Patch the Damage or Re-side?

    Quick Answer

    Repair is usually the better first quote when damage is limited to a few panels or boards, the wall behind them is dry and sound, and a close material match is available. Replacement becomes easier to justify when damage crosses several elevations, the water-resistive barrier or sheathing needs broad work, the existing product is brittle or unavailable, or repeated patches would still leave a mismatched and leak-prone wall.

    Current national guides put a typical professional siding repair at $367–$1,524, averaging $928, while a siding replacement project runs $5,554–$17,721, averaging $11,588. Those figures do not describe the same amount of wall, so do not subtract one headline number from the other and call the result your savings. First make both contractors price the same measured area, removal, disposal, sheathing, water-management details, trim, access, permits, and finish work.

    Cost Snapshot: Repair and Replacement Are Different Scopes

    Option Current national guide Usually includes Commonly left unclear
    Localized professional repair $367–$1,524; $928 average Removing and replacing a limited damaged area, basic labor and material Wall opening, sheathing, water barrier, flashing, paint or color match, lift or scaffold, disposal
    Whole-project replacement $5,554–$17,721; $11,588 average New siding material and installation over a much larger area Tear-off method, sheathing allowance, trim, soffit/fascia, gutters, permits, flashing corrections, rot or mold work

    The repair figures come from Angi’s October 14, 2026 guide. Its broader range can extend far beyond the typical band when damage is widespread, and it separately notes that hidden rot or mold cleanup can add $150–$2,000. Angi’s October 9, 2026 replacement guide includes materials and labor in its main range and says removal and permits can add $150–$1,500, depending on location.

    Use those figures as a reasonableness check, not a substitute for a site inspection. Material, number of stories, access, wall shape, local labor, and what the crew finds after opening the wall can change a quote substantially.

    Repair First When the Problem Is Truly Localized

    A repair quote deserves priority when all of these are true:

    • Damage is confined to a small, measurable area.
    • The contractor can remove enough material to inspect the sheathing and water-resistive barrier.
    • Sheathing is firm, dry, and not broadly stained or deteriorated.
    • Window, door, roof-wall, corner, and deck-ledger flashing can be restored without opening a much larger area.
    • Matching panels, boards, profiles, textures, and colors are available—or you accept a visible blend.
    • Neighboring siding is not brittle enough to break during removal.
    • The same leak, impact, or fastening problem is not repeating elsewhere.

    Ask the contractor to photograph the wall after siding removal and before it is closed. A small repair should not become an open-ended promise that “anything behind it is extra” with no unit prices or approval limit.

    Replacement Becomes More Defensible When the Wall System Is the Problem

    Get a broader replacement option when one or more of these conditions apply:

    • Damage appears on multiple walls or in multiple unrelated spots.
    • Panels are brittle, warped, loose, or repeatedly coming off.
    • The original profile or color is discontinued and patching would remain conspicuous.
    • Water staining, soft sheathing, insect activity, or failed flashing extends beyond the first opening.
    • The wall lacks a continuous water-resistive barrier or has repeated penetrations that cannot be integrated correctly with a small patch.
    • Repainting or recoating most of the elevation is required to make the repair acceptable.
    • The repair quote is becoming a sequence of mobilization charges, patches, and finish work rather than one controlled project.

    Vinyl siding is not the primary drainage plane. The Polymeric Exteriors installation manual says it should go over a continuous water-resistive barrier, with flashing integrated around openings, corners, and roof-wall intersections. A replacement quote that lists only “new siding” but says nothing about those layers is not yet a complete wall-system quote.

    A Same-Scope Comparison Example

    Suppose a storm-damaged section affects 160 square feet around one window. One repair quote is itemized like this:

    Repair line item Illustrative amount
    Mobilization and protected access $450
    Remove and replace 160 sq. ft. of siding $1,600
    Water-resistive barrier and window flashing repair $900
    Sheathing allowance: 4 sheets at $160 installed $640
    Prime, paint, and blend adjacent finish $700
    Cleanup and disposal $250
    Illustrative repair total $4,540

    A second contractor quotes $7,800 to re-side the full affected elevation, including tear-off, the same four-sheet sheathing allowance, water-management work, trim, disposal, and finish. On today’s scope, the repair is $3,260 less.

    Now test the ongoing-cost risk. If the patch still requires a second color-blend visit or broader repaint estimated at $1,200 within three years, the repair path becomes $5,740. The gap falls to $2,060. Repair can still be the rational choice, but the decision is no longer based on a misleading $928-versus-$11,588 comparison.

    This is an illustration, not a national quote. Replace every line with your measured quantities and contractor prices.

    Normalize Every Siding Quote Before You Choose

    Ask each bidder to answer the same questions in writing:

    1. What exact area is included? Record wall, elevation, square feet, linear feet of trim, and number of penetrations.
    2. What product is specified? Manufacturer, line, profile, thickness or exposure, texture, color, and warranty.
    3. What is removed? State whether siding, trim, housewrap, fasteners, caulk, gutters, lights, shutters, and old layers are included.
    4. How is hidden damage priced? Request installed unit prices for sheathing sheets, framing repair, insulation, mold cleanup, and extra wall opening.
    5. What water-management work is included? Identify the water-resistive barrier, tape, sill pan, head flashing, kickout flashing, corners, and roof-wall transitions.
    6. Who handles access and protection? Include lift or scaffolding, landscaping protection, temporary weather cover, and daily cleanup.
    7. What finish work is included? Clarify caulk, primer, paint, stain, color matching, and how far blending extends.
    8. Are permits and disposal included? Ask for the permit allowance, dump fees, and hazardous-material testing if applicable.
    9. When is a change order allowed? Require photos, quantity, unit price, and your written approval before extra work.
    10. What does the warranty cover? Separate manufacturer material coverage from the contractor’s labor and water-intrusion warranty.

    Our contractor quote comparison guide and remodel change-order guide can help you put competing proposals into the same format.

    The Inspection Details That Matter More Than Cosmetic Damage

    Start with the likely path of water, not the ugliest panel. Look above and beside the damage for missing or poorly integrated flashing, overflowing gutters, roof runoff, deck attachments, wall penetrations, and failed sealant. Indoors, check for staining, musty odor, or recurring paint damage near the same wall.

    Do not accept a moisture percentage without context. Ask where it was measured, what reference material was used, whether the reading changed after drying, and what visual or physical evidence supports the conclusion. A meter can guide investigation; it does not define the entire repair scope by itself.

    The contractor should also explain whether a small opening is representative. If the first panel reveals soft sheathing or staining that continues beyond the opening, pause and document the expanded area before authorizing more demolition.

    Safety and Older-Material Limits

    Siding work can disturb more than the visible cladding.

    • Pre-1978 painted surfaces: EPA’s Renovation, Repair and Painting rule generally requires paid contractors disturbing painted surfaces in pre-1978 homes and child-occupied facilities to be lead-safe certified and use lead-safe practices. Confirm applicability before work starts.
    • Suspect asbestos-cement siding: Not all older siding contains asbestos. If the material is suspect, arrange appropriate testing before it is cut, drilled, broken, or removed, and check state and local requirements.
    • Fiber-cement cutting: OSHA’s silica standard specifies dust-control methods for cutting fiber-cement board. This is a contractor-safety issue, but homeowners should also keep people and pets away from the work zone and ask how dust and debris will be controlled.
    • Open wall exposure: Require a weather-protection plan if the wall will be open overnight or rain is possible.

    Do not pry off suspect siding or cut fiber cement just to “see what’s behind it.” A controlled opening by a qualified contractor is safer and preserves the evidence needed for a useful quote.

    Repair, Replace One Elevation, or Re-side the House?

    Decision Best fit Main risk to price
    Local repair One limited defect; sound adjacent wall; match available Hidden damage expands after opening
    Replace one elevation Damage or mismatch is concentrated on one face Corner transitions, trim, and color coordination with remaining walls
    Whole-house replacement Widespread failure, obsolete product, repeated leaks, or planned envelope upgrade Large allowances, accessory scope, and financing can obscure the base installation price

    One-elevation replacement is often the missing middle option. It can correct a wall-system problem and avoid an awkward patch without paying to re-side unaffected elevations. Require the contractor to explain how corners, trim, and drainage transitions will connect to the remaining siding.

    Questions to Ask Before Signing

    • What evidence shows this is a siding problem rather than a roof, window, gutter, or flashing problem?
    • How much wall will you open before we decide whether the scope must expand?
    • What photos will I receive before the wall is covered?
    • Are sheathing and framing allowances capped, or billed by stated unit price?
    • Will replacement disturb lead paint or suspect asbestos-containing material?
    • How will new flashing connect to the existing water-resistive barrier?
    • Is the product match from current stock, a custom order, or a visual approximation?
    • Which permit, inspection, and disposal charges are included?
    • What happens if rain arrives while the wall is open?
    • Which warranty covers installation labor, leakage, and finish matching?

    Keep the proposal, product labels, photos, change orders, permit record, and final invoice together. Our home maintenance record gives you a place to preserve those details for future repairs or a home sale.

    Frequently Asked Questions

    Is it cheaper to repair siding than replace it?

    Usually, when damage is genuinely localized. A typical repair costs far less than a whole-project replacement, but a repair that needs extensive wall opening, sheathing, flashing, access, and finish matching can exceed the headline range. Compare identical measured scope and future finish work.

    How much siding damage is too much to patch?

    There is no universal percentage. The better threshold is whether adjacent siding can be removed and reinstalled without breaking, the wall behind it is sound, the water-management layers can be restored, and the finished patch will be acceptable. Multiple leak paths or widespread brittleness favor a broader option.

    Should a siding quote include sheathing?

    It should at least state how sheathing is handled. Contractors often cannot know the final quantity until siding is removed, so request an allowance or installed unit price per sheet, plus photos and written approval before exceeding it.

    Can new siding go over old siding?

    Sometimes, depending on material, wall condition, manufacturer instructions, and local code. It should not conceal rot or prevent proper flashing and water-barrier work. Ask the bidder to explain the attachment, flatness, drainage, and inspection plan.

    Will repaired siding match?

    Not always. Sun fading, discontinued profiles, grain, gloss, and paint weathering can leave a visible patch even when the nominal color is correct. Review a physical sample on the wall in daylight and price any blending or repainting separately.

    Sources and Verification

    This guide uses published U.S. cost ranges and official safety or installation material. Homestria did not inspect a siding project, perform laboratory testing, or provide a contractor estimate for this article.

  • Dryer Vent Cleaning vs. Repair Cost in 2026: Clear Lint or Fix the Duct?

    Dryer Vent Cleaning vs. Repair Cost in 2026: Clear Lint or Fix the Duct?

    Quick Answer

    Professional dryer vent cleaning typically costs $104–$188, averaging about $145, while a minor vent repair often costs $75–$150 and standard vent replacement commonly costs $100–$300. A new or difficult route is a different job: typical installation estimates run $140–$600, with complex access sometimes reaching $1,000. These are U.S. planning ranges from current secondary cost guides, not a substitute for a local written quote.

    Choose cleaning when the metal route is intact and the problem is lint or another removable blockage. Choose repair when a joint, exterior hood, short transition section, or small damaged area can be corrected without redesigning the route. Choose replacement when the duct is crushed, disconnected, badly corroded, made from unsuitable plastic or foil accordion material, or routed so poorly that cleaning will not restore safe airflow.

    The most useful quote separates inspection, full-route cleaning, repair materials, access, exterior termination work, and airflow verification. Paying for cleaning alone will not fix a crushed duct; replacing an intact duct will not make routine lint maintenance optional.

    Cleaning, Repair, and Replacement Are Different Scopes

    Service Typical 2026 planning range What it should address Common exclusions to confirm
    Professional vent cleaning $104–$188; about $145 average Lint and removable blockage through the accessible route Roof access, bird or rodent removal, duct repair, wall opening, booster-fan service
    Minor vent repair $75–$150 Loose joint, small damaged section, exterior flap, or short transition correction Full cleaning, concealed damage, new route, drywall or roof repair
    Standard vent replacement $100–$300 Replacing an accessible existing section or route of ordinary complexity Long concealed run, roof work, major finish repair, electrical or gas-appliance work
    New or complex installation $140–$600 typical; up to $1,000 in difficult cases New route, major rerouting, difficult access, or exterior termination Permit, finish restoration, pest remediation, appliance repair

    The ranges overlap because contractors may use “repair” and “replacement” differently. One quote may cover a four-foot transition duct behind the dryer; another may cover a concealed run through a wall and roof. Normalize the scope before comparing the number.

    Start With the Failure, Not the Service Name

    Long drying times can point to restricted airflow, but they do not prove that the entire vent must be replaced. Use this decision path:

    1. Stop and inspect from outside the appliance. Unplug an electric dryer before moving or visually checking the accessible connection. Do not disconnect gas piping or open the appliance.
    2. Look for visible damage. A crushed transition duct, disconnected joint, damaged exterior hood, or unsuitable accordion-style plastic or foil material is a repair or replacement issue—not just a cleaning issue.
    3. Check the exterior termination during a cycle. The flap should open and airflow should be present. Keep hands and tools away from moving equipment and hot exhaust.
    4. Ask for a full-route assessment. The contractor should identify the termination point, approximate length, bends, access method, and whether the route is intact.
    5. Verify the result. A completed service should leave the connection secure and the exterior termination operating. If the dryer still takes unusually long, appliance diagnosis may be needed.

    The U.S. Consumer Product Safety Commission warns that blocked airflow can create excessive heat and a fire hazard. It recommends replacing plastic or foil accordion ducting with rigid or corrugated semi-rigid metal ducting. The U.S. Fire Administration advises cleaning dryer vent ductwork every year and checking that the vent is not damaged, crushed, or restricted.

    What a Full Cleaning Quote Should Include

    A useful cleaning quote states:

    • Whether the technician cleans from the dryer connection, exterior termination, or both.
    • Whether the price covers the entire route or only an accessible section.
    • How roof, crawl-space, attic, or upper-story access is priced.
    • Whether the dryer will be moved and reconnected.
    • Whether the transition duct and clamps are inspected.
    • Whether the exterior hood and flap are cleaned and checked.
    • Whether a before/after airflow reading, visual confirmation, or photo is provided.
    • How nests, pests, wet lint, a disconnected run, or a booster fan change the price.
    • Whether cleanup and disposal are included.

    “Clean dryer vent” is too vague if it does not identify the route and access point. Ask the contractor to write the approximate length and termination location on the estimate.

    What a Repair or Replacement Quote Should Include

    For corrective work, require the estimate to separate:

    Quote line Why it matters
    Diagnosis / inspection Shows how the contractor distinguished blockage from structural damage
    Duct material and diameter Confirms what is being installed and whether it matches the dryer manufacturer’s instructions and local requirements
    Length, bends, and route Explains labor, pressure loss, and access cost
    Transition connection Identifies the short connection behind the dryer rather than hiding it in “miscellaneous materials”
    Exterior termination Covers hood, flap, sealing, and weather exposure
    Access and finish work States who opens and closes walls, ceilings, roof surfaces, or cabinets
    Cleaning after repair Prevents a new section from being connected to a lint-packed old section
    Testing and warranty Records the completion check and responsibility for leaks or disconnection

    If a new route penetrates an exterior wall or roof, ask who is responsible for weatherproofing and finish restoration. A low vent price can become expensive if siding, drywall, roofing, painting, or cabinetry is excluded.

    Worked Example: Cleaning Plus a Small Repair

    Assume a contractor finds an intact main route but a crushed transition duct behind the dryer. The quote lists:

    Item Illustrative amount
    Full-route cleaning $145
    Replace short transition duct and clamps $125
    Inspection / airflow check $50
    Same-visit credit −$50
    Illustrative total $270

    The arithmetic is $145 + $125 + $50 − $50 = $270. These amounts are an example of quote structure, not a national package price. A roof termination, long concealed route, pest removal, wall opening, or appliance repair would change the total.

    Compare that with a cleaning-only quote of $145. The cheaper quote is not equivalent if it leaves the crushed connection in place. Conversely, a $600 replacement proposal is not automatically better if the main route is intact and the only defect is an accessible transition section.

    Cleaning May Be Enough When

    • The duct is metal, connected, and not visibly crushed or corroded.
    • The route and termination are accessible for complete cleaning.
    • The exterior flap operates after the blockage is removed.
    • The contractor finds no concealed disconnection or moisture damage.
    • Drying performance returns to normal after the full route is cleared.

    Repair or Replacement Deserves Priority When

    • The transition duct is crushed, torn, disconnected, or repeatedly kinked.
    • The route uses plastic or foil accordion material that CPSC advises replacing.
    • The exterior hood is broken, stuck, or allows weather or pests into the route.
    • A joint has separated inside an attic, crawl space, wall, or ceiling.
    • The route is corroded, wet, severely restricted, or impractical to clean fully.
    • A poor route creates recurring blockage and a qualified contractor recommends a compliant redesign.

    Do not keep operating a dryer that produces a burning smell, visible smoke, sparks, or extreme heat. Stop using it and arrange qualified service. Cleaning the vent is not a substitute for appliance, electrical, or gas diagnosis.

    DIY Boundary

    Homeowners can clean the lint screen after each load, inspect the visible transition connection, and keep the exterior termination unobstructed when it is safely reachable from the ground. Do not climb onto a roof, open finished walls, disconnect gas piping, improvise a duct material, or reach into an energized appliance.

    If the route is long, concealed, roof-terminated, damaged, or associated with a booster fan, use a qualified professional. Ask the contractor to follow the dryer manufacturer’s instructions and local code requirements rather than promising a universal maximum length.

    Questions to Ask Before Authorizing Work

    1. Is the problem lint, physical damage, poor routing, or an appliance fault?
    2. What part of the route did you inspect, and where does it terminate?
    3. Does the price cover the complete route and exterior hood?
    4. Are roof, attic, crawl-space, or wall access charges included?
    5. What duct material and connection method will you use?
    6. Will the dryer be moved and reconnected, and is that included?
    7. What would trigger a change order?
    8. How will you confirm airflow and a secure connection after the work?
    9. Who repairs drywall, siding, roofing, paint, or cabinetry if opened?
    10. What workmanship warranty applies?

    Save the estimate, photos, route description, invoice, and completion check with your home maintenance record. Those documents make recurring clogs and later quotes easier to compare.

    FAQ

    How often should a dryer vent be cleaned?

    The U.S. Fire Administration advises cleaning dryer vent ductwork every year. A household with a long route, many bends, heavy dryer use, pets, or recurring slow drying may need more frequent assessment. The dryer manufacturer’s instructions and the route’s actual condition should guide the schedule.

    Does a slow dryer always mean the vent is clogged?

    No. Restricted airflow is one possible cause, but a crushed duct, stuck exterior flap, disconnected route, appliance fault, or load and cycle choice can also matter. If full-route cleaning does not restore performance, arrange appliance diagnosis.

    Is foil dryer duct safe?

    CPSC advises replacing plastic or foil accordion-style ducting with rigid or corrugated semi-rigid metal ducting. The exact permitted material and installation depend on the dryer instructions and local requirements.

    Should cleaning be included when a vent is repaired?

    Ask explicitly. A repair quote may replace the damaged section without cleaning the remaining route. If lint is present elsewhere, combining the work can prevent a new connection from being attached to a restricted duct.

    Why is a roof-terminated vent more expensive?

    Roof access can require additional safety procedures, equipment, time, and weather limitations. It may also involve roof or exterior termination work that a basic ground-level cleaning price excludes.

    Sources

    This article provides homeowner budgeting and quote-comparison guidance, not appliance, gas, electrical, roofing, or code advice for a specific home.